Today's creative share is prompted by two things. First, because Jamie from The Creative Imperative is thinking outside of the box as she remodels her son's bedroom with her repurposed tarps-turned-curtains, and we love people who repurpose and rethink! Second, she understands the kindred spirit of blogland and shares her tutorials freely so that others can try for themselves (see her comment on yesterday's post 'Recycled Frames and Copycat Dilemmas') as many of you do.
So let's take a look at Jamie's curtains...
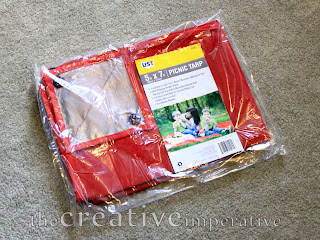
...that began their life as a tarp (I didn't even know tarps came in red!)
The added bonus? I bet that silver lining on the back acts as a nice light filter - almost the same as an expensive curtain liner.
While you are there having a peek, don't miss her wall and window upcycle with trim. Great results and great color scheme.
Thanks, Jamie, for leaving your comment on the discussion yesterday.
I am genuinely interested in hearing your input on the 'copying' discussion if you hop back to yesterday's post and tell me what you think. Where do you think the lines are drawn between sharing and copying?
Until next time...
Mike
Stumble this post
Showing posts with label remodel. Show all posts
Monday, October 31, 2011
Wednesday, August 24, 2011
Semi-Extreme Home (Uh, Office) Makeover - Part II
Time for another episode of the Semi-Extreme Home (Uh, Office) Makeover.
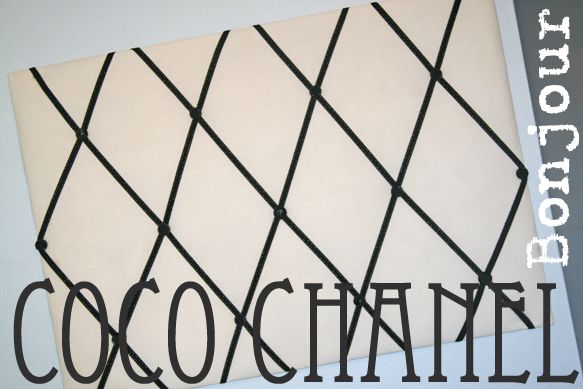
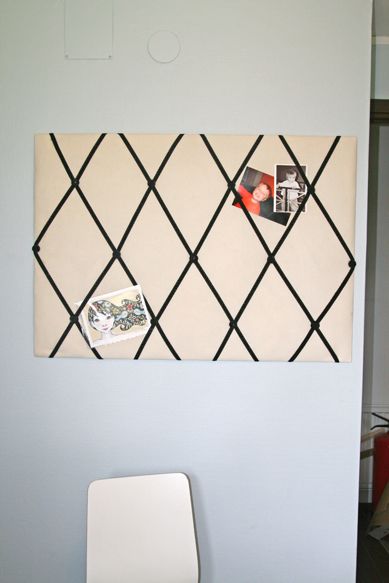
So, while I'm waiting for inspiration to come down and strike me over the head - giving me just the right idea for a window treatment - I finally brought out the message board that I made over 4 years ago (not kidding) alongside my mom who was over here for a vacay visit. And although I was absolutely in love with this message board and she turned out exactly how I wanted, she never found a wall to call home - but survived being moved around umpteen times from storage space to storage space.
Well, now she has a home and is ready to strut her stuff.
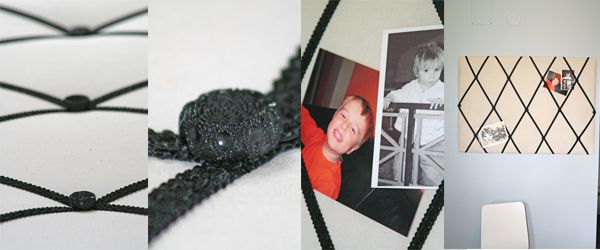
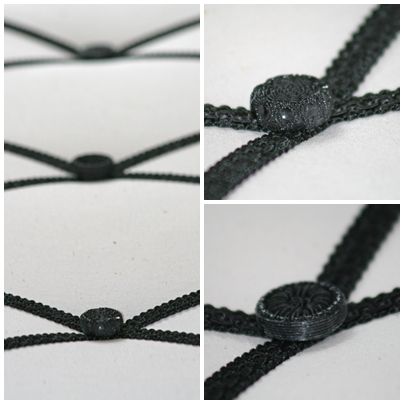
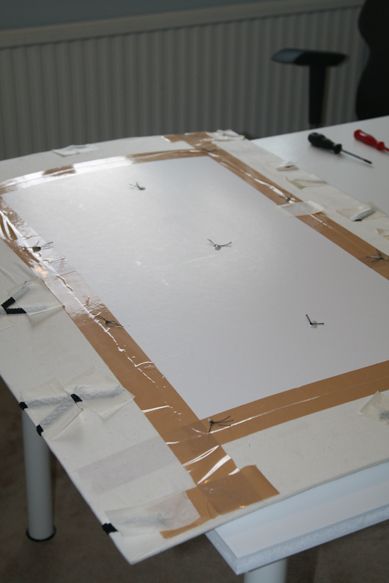
Just like the legendary Coco Chanel, she has a lot of skeletons in her closet. For instance, just take one look at her backside and you'll see she's not as fancy as she appears. In fact, she's made from a piece cardboard, batting, some scrap muslin material, and packing tape. However, and just like the original Coco, her accessories are impeccable with vintage ribbon (actually from Paris) and mismatched black vintage buttons.
How to? Lay the batting over the cardboard, then wrap the muslin around, and glue on the backside. Use the packing tape to hold it in place while the glue dries, and then decide to leave the tape on there forever and ever. Lay the ribbon in place - criss crossing each other to form the harlequin pattern - and glue around on the backside. Again...tape to hold while drying. Find a large, thick needle that will go through the cardboard and thread on your buttons at the connecting points of the ribbon. Use a thick thread or even embroidery threads and tie on the backside.
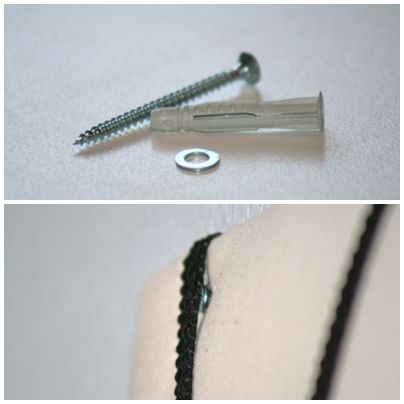
How did we hang her? By placing the screws discretely behind the ribbons near each of the four corners. So it looks like she is magically hanging without hardware.
Voila! She's gorgeous, and has found herself a home in the (hopefully) soon to be revealed office remodel.
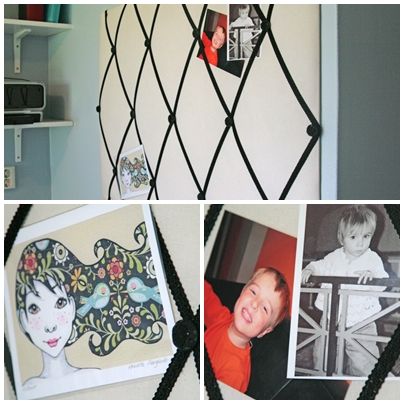
I can't wait to expand her line of accessories. Right now they include my inspiration for the office, Elianne from Carambatack Design in Norway, and photos of my babes as babies. Elianne will be framed, but until that time she complements Coco.
Now if I could only talk Diane from In My Own Style to come for a window treatment consultation! Well, here's to dreaming.
Until next time...
Mike
Stumble this post
Labels:
Black and White,
buttons,
DIY,
European,
Inspiration,
remodel,
renovate,
tutorial,
walls
Tuesday, August 16, 2011
Semi-Extreme Home (Uh, Office) Makeover - Part I
Well. It's happened. We have officially switched gears from our unfinished bedroom remodel to an office space remodel.
Is it just us? Or does this happen to you, too? You get to a stopping point on one remodel project - and that is just enough to take the steam out of you. Then you get excited about starting something else? My hope is that one day it will all come full circle, and we come back 'round to finish those projects that we put on hold.
Having said that, I am happily sitting in my freshly painted bright office - feeling much more inspired than in the cluttered cave I had to work with before. We are a few days away from being done (which could mean about 3 months according to our remodel patterns), but meanwhile I have a quick and easy upcycle project to share, and a peek at another in progress - both adding to the office decor but practical at the same time.
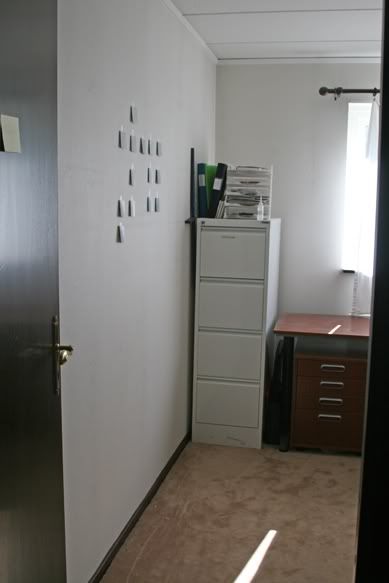
While I was watching paint dry - no joke - I had a look at our plain white metal file cabinet in the middle of the room and thought, "I can do better than that." So, off I went to my
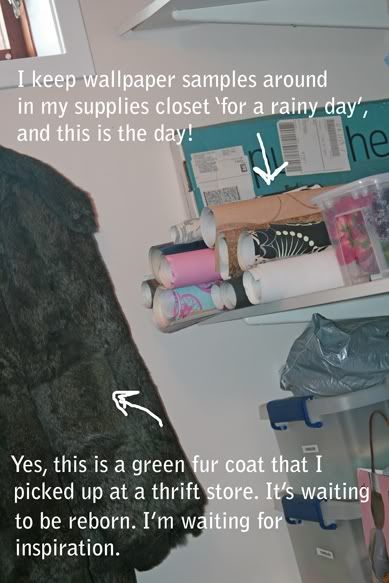
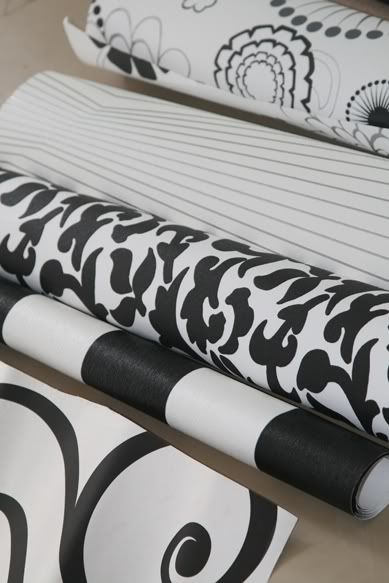
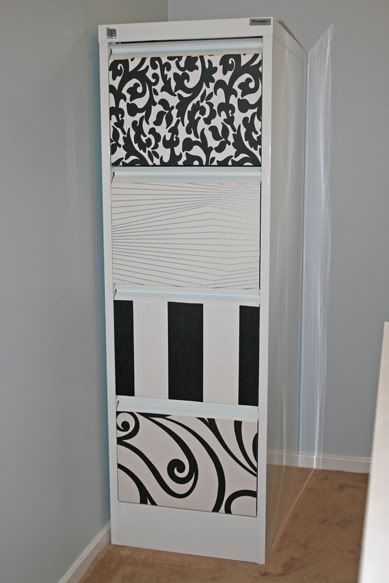
I like to take a few wallpaper samples each time I visit my local home builder's store. I've got a nice little collection now. There are multiple papers inside each of those rolls.
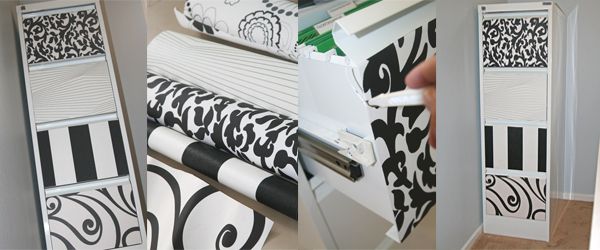
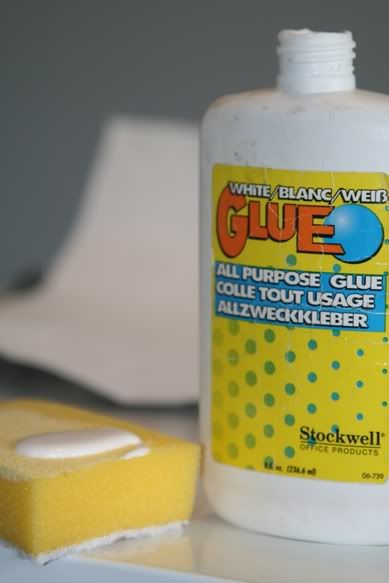
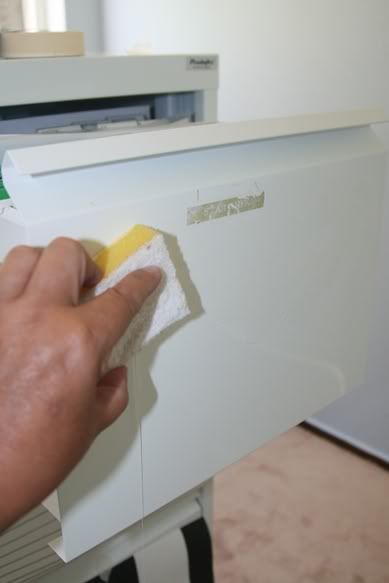
After a quick cleaning of the lower part of the cabinet with a Mr. Clean magic eraser (which of course I have to bring back with me each time I visit the U.S. since we don't have them here in Sweden yet), I cut the wallpaper to the size of the cabinet drawer fronts. Then it was time to arrange the papers by using tape and switching them around until I was happy. Next came a kitchen sponge to smear on some good ol' fashioned glue (like Elmer's), straight onto the cabinet.
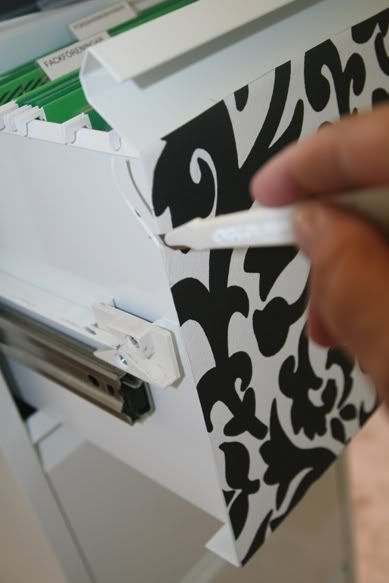
Up went the wallpaper piece, and out came an exacto knife to slice off those extra bits hanging over the edges.
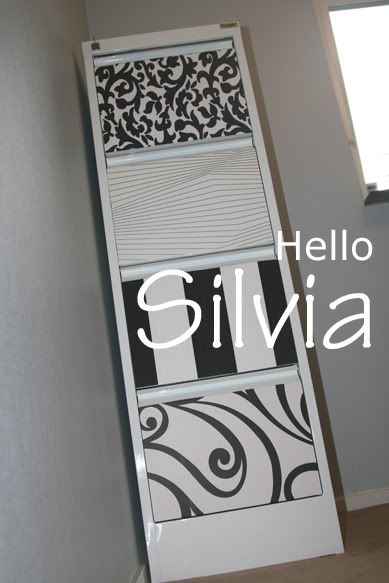
Ta-dah! Here she is - all dressed up and nowhere to go. But she does has a fresh new space to stand in.
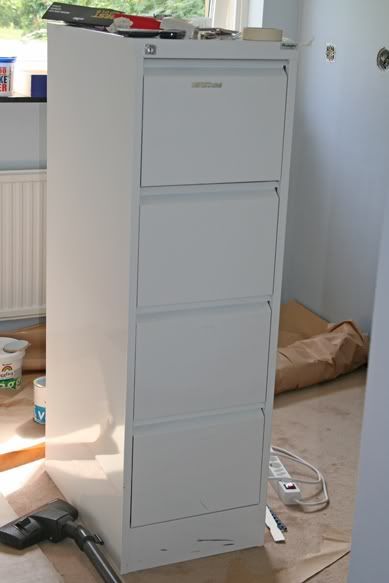
Here's a look at the before.
And after.
It was a super simple upcycle project - and with freebie wallpaper samples that I keep around, it didn't cost me a penny! Just an hour of time.
Stick around for Part II of the Semi-Extreme Home Office Makeover.
Until next time...
Mike
Link parties: The DIY Showoff, Making the World Cuter,
Labels:
Black and White,
DIY,
remodel,
tutorial,
Upcycled
Tuesday, July 19, 2011
Semi-Extreme Home (Uh, Bedroom) Makeover - DIY - Part II
Did you catch the first episode of our Semi-Extreme Home Bedroom Makeover? It ended in a not-quite-right moment. Ugh! Don't you hate spending time on a project and your heart doesn't flutter when you stand back to admire your genius self? Well, my best advice is to sit with it
Down comes the floating wall hanging and out comes a super long strip of black velvet (ahhh, velvet) picked up from the scrap bin at the fabric store. I vow there will be
no sewing this time! I did bring out my handy-dandy European flip measuring stick (hmmm...I might have to post about some of my favorite tools sometime soon) to make sure that the width of my (now) two strips of fabric were the same after I folded under the edges, and that they were placed the same width from the opposite outer edges of the wall hanging. I pulled them tight, stapled them over the edges, and for some unknown reason actually trimmed the backside - even though it would be sight-unseen when hung on the wall again. That's the wierd thing. For every corner I cut in DIY projects, for no good reason other than lack of patience, I have a polar side that must have things neat and tidy in the end.
Now we are getting somewhere! Ah, my beloved black and white (ok, beige, but close enough)! Now my heart starts to flitter. Now I can see her coming into her own.
I have been so inspired by the use of vintage and costume brooches lately (click on inspiration here and here) that I've subconsciously started a little collection. And while I'm waiting to collect enough to actually do something with, I'm thinking to myself, "Why not use them to embellish a project in the meanwhile?"
Out they come, perfectly suited on their black velvet background. My husband asked, "Where are the pins on my side?" Well...that brooch DIY project may have just shown itself. We'll just have to wait and see!
Until next time...
Michael
Stumble this post
Labels:
Black and White,
DIY,
Inspiration,
remodel,
tutorial,
walls
Thursday, March 24, 2011
Taking Risks and a Kitchen Remodel
- Antoine de Saint-Exupéry (1900-1944), The Little Prince
I love this quote - for me it is a representation of all things lost when we avoid taking risks, great or small. I can't say it has been comfortable, but I am not opposed to the idea of taking risks.
I took a risk 13 years ago when I bought an old 1912 uninhabitable Victorian house. It was one of the greatest projects of my life, created with my own hands alongside those of family and friends. I didn't know at the time, but the process of bringing that house back to life was a direct metaphor of bringing my own self back to life. Within 2 years, I resigned from my job, sold that lovely house, and packed up whatever belongings I had left after a major yard sale purge. I was ready to take my next risk, a 12-month (or so) period of travel in Europe and across the United States. So, off I flew to Europe. I could not begin to understand that one of my life's biggest risks was yet to come. Not even 2 months into my travels, I met a man at the train station in Gothenburg, Sweden, when I asked if he spoke English and could help me find my lost CD player. He said 'yes', and 2 months later I said 'yes'. That man is now my husband, and that 12-month travel plan never happened, and I never returned to the U.S. to unpack all of those belongings I had left behind. That was 10 years ago! Yes, I've taken some risks.
We bought a house nearly 3 years ago, one that requires total renovation in order to properly give it a new life. It's a much slower process for me this time - but none the less satisfying. We've tackled the kitchen first, and it wasn't until we took the risk of finishing some of the work ourselves that we really got a kitchen that includes a real piece of us - regardless of what current trends of Sweden dictate. Let me explain. But first, a peek at the (almost) finished product.
Now a look at where it all began.
It wasn't until I added this little piece of 'junk' to our kitchen that I felt it was more complete, more mine. The wall below this area was not totally smooth and the rest of my tile turned out a little jiggly - something my husband said added more character (bless him).
The glass mosaic tile wall may not be perfect...but it IS perfectly me!
Those belongings I left back in the States were whittled down over the years and dispersed to my American family - all but the most near and dear items and artwork that represented my 'historical me' - which have finally been reunited with me here in Sweden. Thus, the reason for starting this blog and naming it after my precious-but-less-than-perfect blue velvet chair. As cheesy as it sounds, my past has now joined my present and I feel more whole as I move into the future.
A big thanks to Nesting Place for your National (not really) Take a Risk Day.
Until next time...
M
p.s. If you enjoyed this post, I hope you'll become a follower of my blog and a fan on FB.

Labels:
DIY,
Inspiration,
my story,
remodel,
renovate
Subscribe to:
Posts (Atom)