Wednesday, July 20, 2011

Repurposed DIY For Everyone!

I've heard it from so many different people...and I've said it myself! "I wish I could..." I'd like to showcase some repurposed DIY designs I've collected that I think anyone and everyone could do - and do well! It won't be hard to find the supplies, either. Not only will you feel the elation of creation (hey, that rhymes!), you'll also be warm and fuzzy in your heart -  knowing that you're helping to save the Earth, one repurposed project at a time.

spotted at Canadian House & Home


spotted at Curbly


spotted at Casa Diseno


spotted at Angelina La Dawn


spotted at Thea's Mania


spotted at Real Simple


spotted at Spearmint Baby

spotted at Poppytalk


So, no more "I wish I could...". Next time it's just "I could."

If you are looking for repurposed DIY inspiration, check out my Pinterest board for unique ideas at every level.

Until next time...
Michael

Stumble this post

Tuesday, July 19, 2011

Semi-Extreme Home (Uh, Bedroom) Makeover - DIY - Part II


Did you catch the first episode of our Semi-Extreme Home Bedroom Makeover? It ended in a not-quite-right moment. Ugh! Don't you hate spending time on a project and your heart doesn't flutter when you stand back to admire your genius self? Well, my best advice is to sit with it for a couple of weeks a while, and then CHANGE IT so your heart flies!

Down comes the floating wall hanging and out comes a super long strip of black velvet (ahhh, velvet) picked up from the scrap bin at the fabric store. I vow there will be
no sewing this time! I did bring out my handy-dandy European flip measuring stick (hmmm...I might have to post about some of my favorite tools sometime soon) to make sure that the width of my (now) two strips of fabric were the same after I folded under the edges, and that they were placed the same width from the opposite outer edges of the wall hanging. I pulled them tight, stapled them over the edges, and for some unknown reason actually trimmed the backside - even though it would be sight-unseen when hung on the wall again. That's the wierd thing. For every corner I cut in DIY projects, for no good reason other than lack of patience, I have a polar side that must have things neat and tidy in the end.


Now we are getting somewhere! Ah, my beloved black and white (ok, beige, but close enough)! Now my heart starts to flitter. Now I can see her coming into her own.

I have been so inspired by the use of vintage and costume brooches lately (click on inspiration here and here) that I've subconsciously started a little collection. And while I'm waiting to collect enough to actually do something with, I'm thinking to myself, "Why not use them to embellish a project in the meanwhile?"


Out they come, perfectly suited on their black velvet background. My husband asked, "Where are the pins on my side?" Well...that brooch DIY project may have just shown itself. We'll just have to wait and see!


Until next time...
Michael


Stumble this post

Monday, July 18, 2011

Semi-Extreme Home (Uh, Bedroom) Makeover - DIY

We have been in the process of remodeling our bedroom forever! Okay, not forever...but for a really long time. Okay...more like 3 months. But that feels like forever! Maybe because it seems like there is still so much more left to do. And maybe because my Swedish hubby and I are the masters of starting a remodel project...and then getting distracted and moving on to start another remodel project...only to get distracted and start yet another remodel project (case in point, our still unfinished kitchen remodel). I'm hoping enough distractions will lead us back to the project we started on.


We don't get a lot of space in the master bedrooms over here in Sweden, so it's important to be clever with your space. We decided to forego the free-standing bureaus and dressers for storing our clothes (which I find devastating given all the excellent dresser re-dos out there in blogland) - and build our cabinets directly on the wall (LOVE flat pack packaging from IKEA - we're using the Bestå line - intended for living rooms, but we're *gasp* breaking the rules).

So...while we've moved on taken a pause in the room renovation, I decided to DIY a quick wall hanging to put on that wall that is nicely framed between the cabinets and the headboard. I used a beige curtain that I had in storage that matched the color of the wall quite nicely. Some scrap teal velvet (mmmm, velvet) gets a little kamikazi sewing treatment. A large 4-foot-or-so sheet of MDF board, some decently thick batting, scissors and a staple gun rounded out the supplies.

Sew the seams on the strip (no measuring, just use the foot on the machine as your guide), and then sew the strip on the curtain material with one of the machines 'decorative' stitches. Staple on that batting, and then the material. Ahhhh, staple guns...one of the most satisfying tools out here! Seriously! You must try it.


I knew I wanted the wall hanging to 'float' on the wall, so my assistant hubby glued some scrap wood pieces on the back of the MDF board for me and we let it set overnight (I hate waiting). Next day was to simply add eye screws and some scrap wire for hanging, and then hang it on the wall and stand back to admire it.


Hmmmm...head cocked to the side...it wasn't quite the effect I was hoping it would be.


So, what happens next? Don't miss the next episode of "Semi-Extreme Home Bedroom Makeover - Part II"

Until next time...
Michael

Craftaholics Handmade Gift Exchange

I jumped at the chance to participate in the latest Craftaholics Handmade Gift Exchange - it's like a pen pal...with crafts! I love this concept and the idea of sharing talents - and Linda hosts these exchanges twice per year, so you still have a chance to hop in later this year.

I just received my craft pal's gift and it's perfect for me! Why? Because I don't have the ability to make these in my own bag of DIY tricks, AND because I am always on the search for bookmarks! Her G-ma taught her how to make them. How cool is that...traditions rock!


Now is the time to close the window if you are Sandy B. and haven't received your packet yet - or keep your eyes open if you want a little sneak peek of what's in the mail! For Sandy, I made these sweet little wire angel ornaments. Yes, it may be a bit early for Christmas...but never too early to receive Christmas gifts!


Make sure to check out Linda's Craftaholics Anonymous blog and watch for the next round of the Handmade Gift Exchange.

Until next time...
Michael

Friday, July 15, 2011

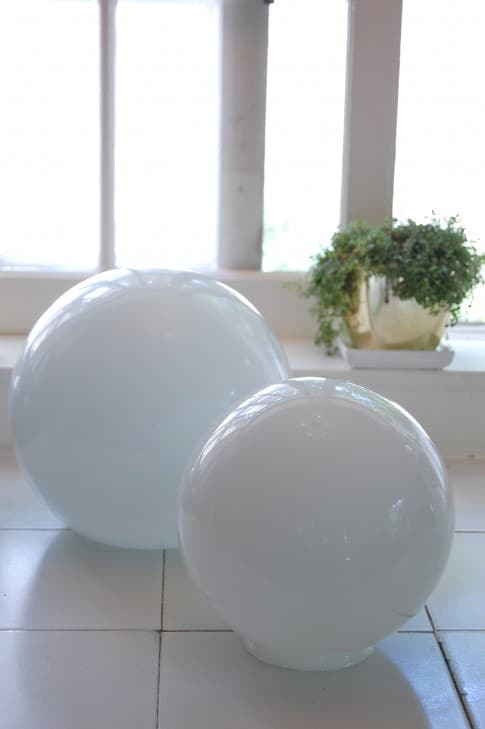
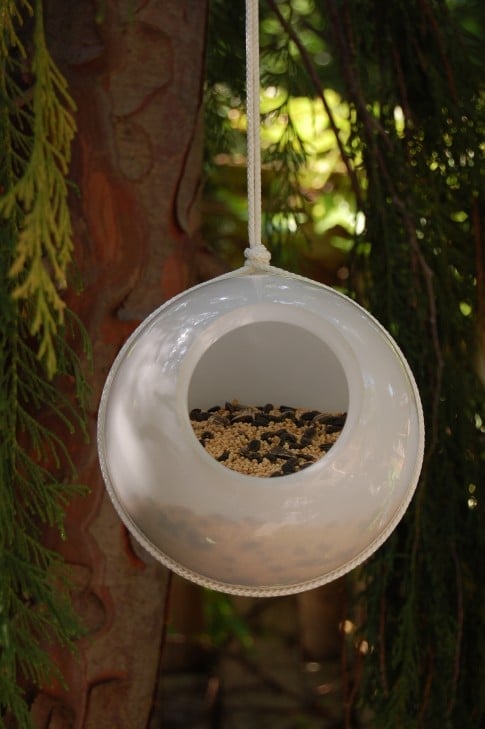
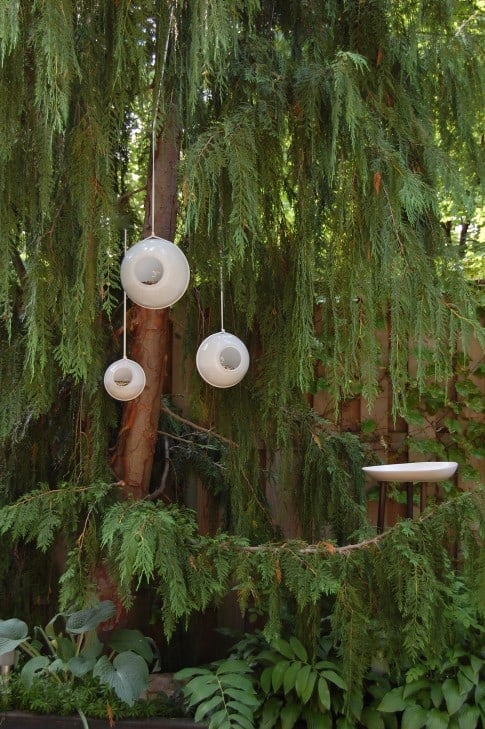
Repurposed Light Globe Turns Bird Feeder

This is another one for the 'why didn't I think of that' file!

Karen from The Art of Doing Stuff took something that we've all seen a million of over the years, and turned it into something uber-chic for the garden.

From this...


...to this!


Karen even gives us the tips and tricks of how to make them for ourselves.


1/2 hour and $4 was all it took. Glass light globes - another thing to add to my growing thrift store 'search and discover' list. Karen, I can't wait to see what you do next with these old white globes!

Until next time...
Michael

Stumble this post
Related Post for bluevelvetchair.blogspot.com