Showing posts with label color. Show all posts

Thursday, March 22, 2012

Finding Your True Colors

I was trying to match some colors from a picture that had that 'it' feeling when I looked at it. So I did a bit of looking around and found these two super-easy-to-use color palatte programs that I think you'll like to play with. Want to match colors in a picture? Or find the perfect color for your next painting project?

Start with this color palette match program from CSS Drive. It's so simple - you have the option to find the color palette in a particular photo with a quick photo upload, or find the palette for a web page that you like by simply entering the URL. The Palette Generator quickly gets results and even gives you light, medium, and dark shades within the same palette. And as if that's not enough, it gives you a full 49 shade palette with every subtle nuanced tone.


The second program is Color Scheme Designer. Just find the little black dot on the color wheel and move it anywhere around the wheel to get a palette according to the schemes you choose - Mono for similar shades, Complement shades, triad, tetrad, etc. I just had a great time moving around the wheel and watching the real-time color palettes appear.


Now it's time to click on some colors!

Until next time,
Mike

Friday, February 10, 2012

What's That ?! - Recycled

It's time for another What's That ?! to take us into the weekend.  Any guesses for the material used for this brightly colored wall art?


Here's a closer look.


Would you believe me if I told you it was...


...the insides of spray paint cans?

The folks at Canlove even use the bottoms and tops of the paint cans for art.


If you caught the "50 Ways to DIY Your Valentine - Recycled and Repurposed" post last weekend, you'll recognize their work from one of the fabulous hearts I featured.

Make sure to hop over to their site and learn how you can get involved by donating cans, time, money or space. Help support their 'No Can Left Behind' campaign to clean up the environment and create new and beautiful art.

Until next time...
Mike


Stumble this post

Tuesday, February 7, 2012

Recycled and Repurposed Winter Scarves

Checked off my list this past weekend:
Make Divine Little Miss M a funky little skirt from recycled winter scarves.


Pin It


This gave her plenty to jump about...


...and plenty to dance about.


Check out the tutorial that shares all my secrets about hacking my way through this sewing experiment to create a funky little one-of-a-kind winter skirt for my one-of-a-kind little chica.

Did you see my other sewing experiments from 2011?
-Vintage silk souvenir scarf dress (this was my favorite last year)
-1 Shirt repurposed to girl's dress and leg warmers
-3 recycled Ts become 1 graphic girl's dress

Real seamstresses beware! My hack sewing methods are not for the faint of heart! See that little pink shrug she's wearing around her arms? Those are the leftover legs from a too-short pair of leggings. More on that with the how-to tutorial.

Until next time...
Michael


Stumble this post

Wednesday, December 21, 2011

Easy & Fun Last-Minute Decorating for Christmas

Still decorating.

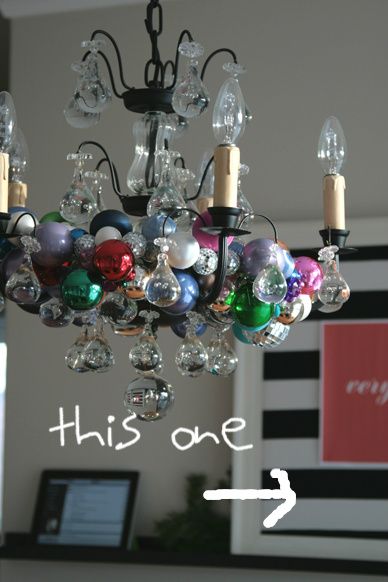
Yesterday when I posted a 
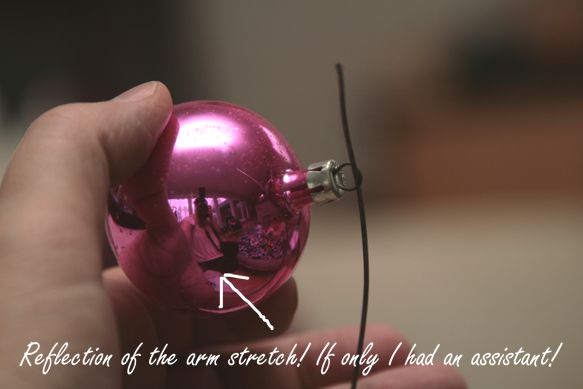
quick project with leftover christmas balls, I promised to show this ridiculously quick and easy decoration that was in the background. Made them in about 30 minutes.


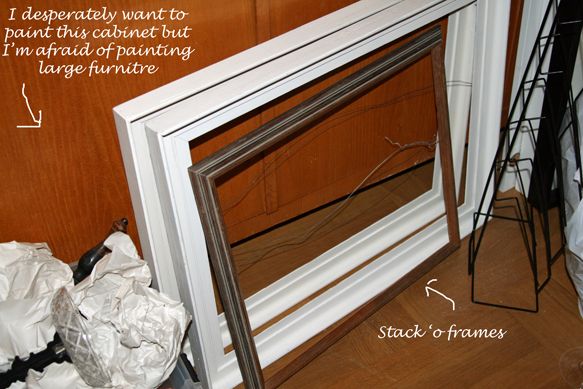
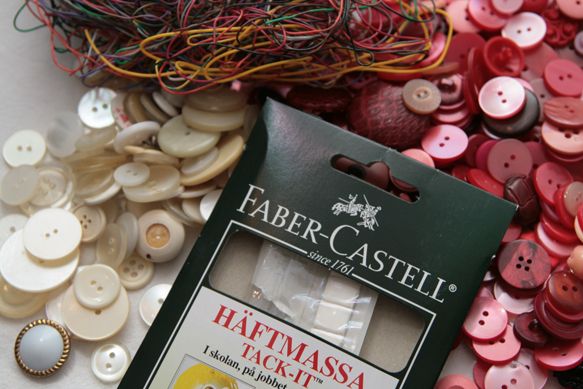
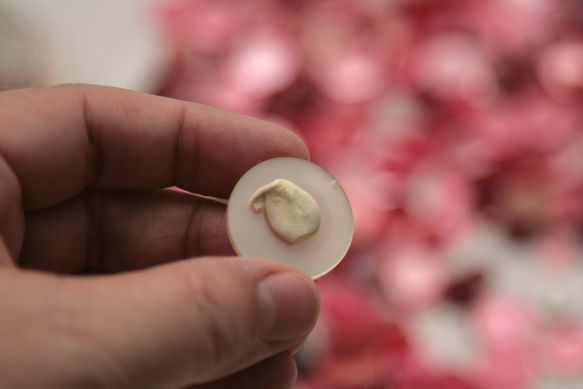
What you need:  a couple of old thrifted frames from your pile 'o frames, your trusty dusty staple gun, some fabric that makes your heart sing, a printer and some kind of super easy photo software, buttons, and some blue tack (which is actually white, in this case).


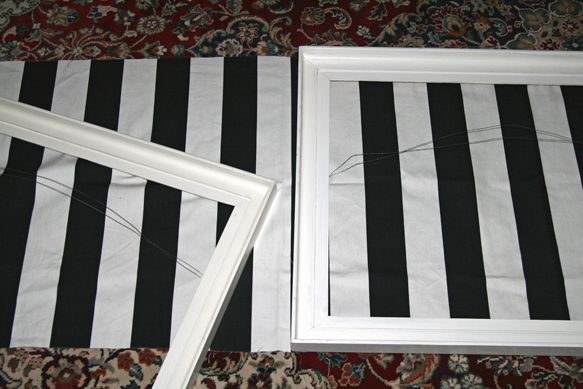
I had this sample of IKEA fabric laying around for about a year now...thought I was going to use it for our oversized ottoman we are making...but it was too bold for that space. Then I thought it might go for a valance curtain on a window. Nope. Not that either. But I LOVE accents of black and white, so out it came to find its place as the backdrop of these simple holiday decorations.


What's next? Staple. You can cut the material to 'about' the size, and just staple it to the back of the frame. Pull and stretch as you do.

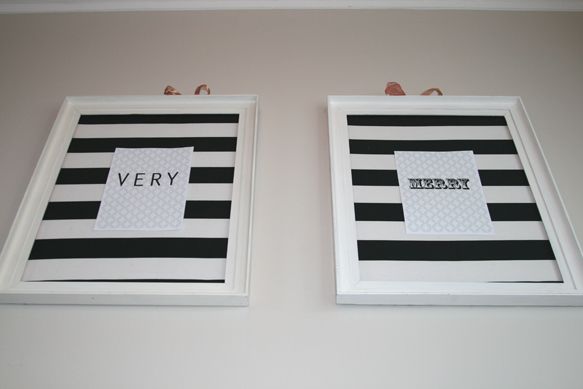
This was the first round that went up last minute (literally) before this year's annual ornament exchange  with girlfriends - handmade of course. I used one of the free sage green backgrounds that I know and trust from Aimee at Sprik Space. "Very Merry". That's my message this year.


They looked a bit lonely on that wall behind our table. Of course, with bits and parts of the house still not remodeled, the final look doesn't come together quite yet. You can see in the pic below what's done and what's still in progress.


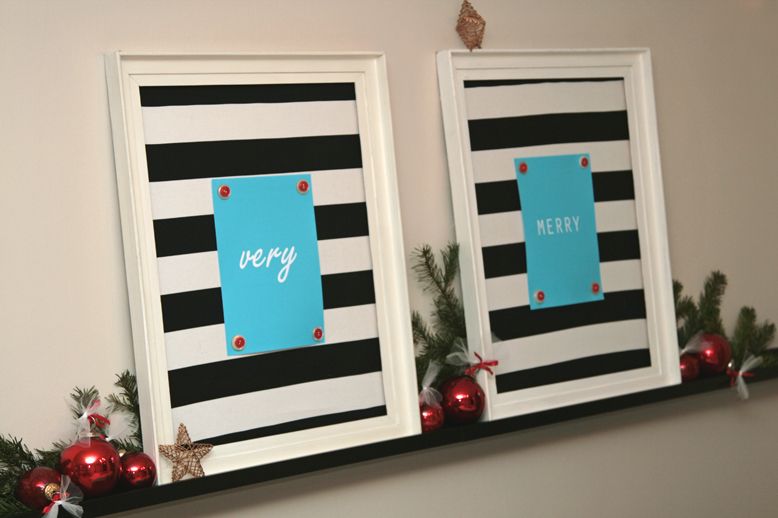
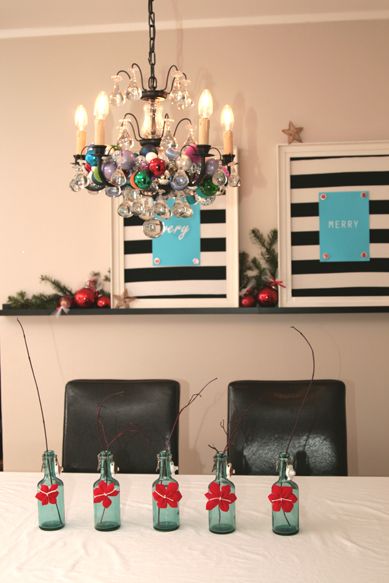
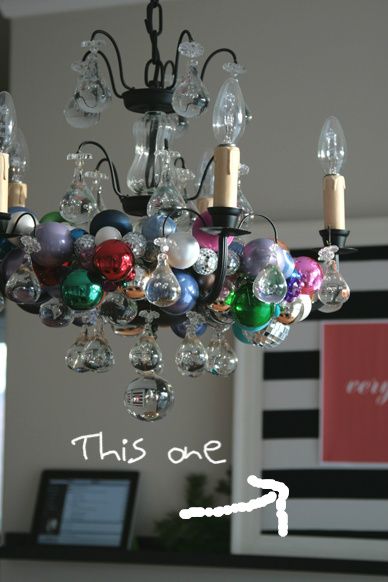
Now, I liked the pale sage green, but it wasn't making me look twice. So I changed to a muted red background, like you saw in the photo of my last-minute chandelier holiday dress yesterday.


You can also see that my hubby put up a couple of 
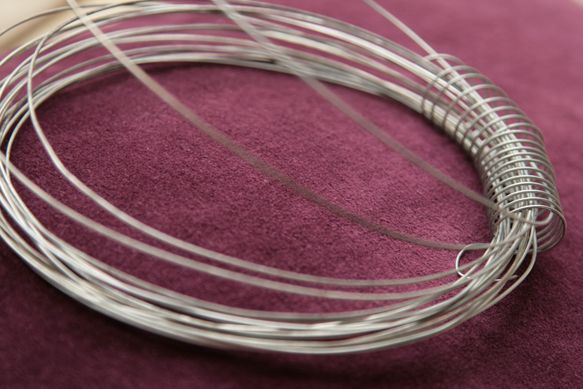
IKEA picture rails for me (so that time isn't included in the 30 minutes it took me to do these quick frames). Next grab some buttons and blue tack. I originally pulled out some colored wire from my craft stash, but it didn't find a home here.


No, I didn't even bother to glue the buttons because I'll just take them apart and use them somewhere else another time. This isn't a permanent installment, so the solutions don't need to be permanent. 


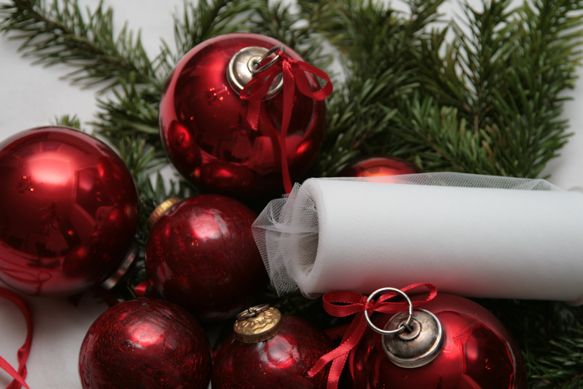
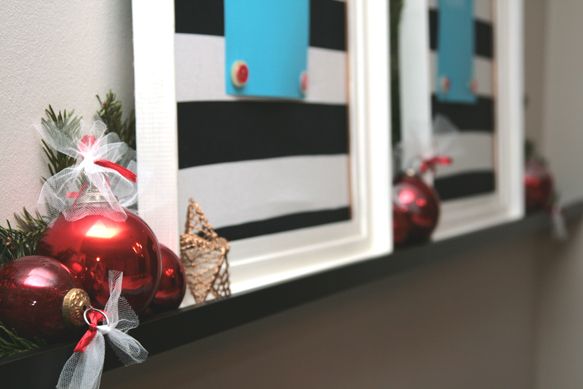
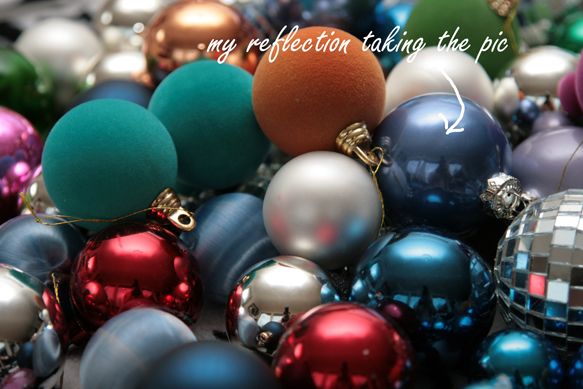
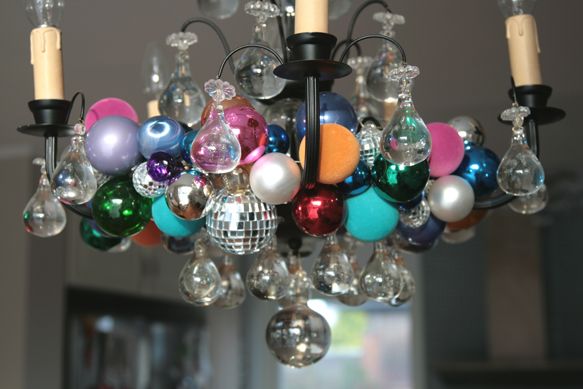
I grabbed the last of my extra christmas balls - the ones that were too heavy to put on the chandelier dress - and gave them a home on the picture ledge beside the frames.


A couple of times passing by made me realize I wasn't digging the muted red either. So one last trip to the computer scored me this fun turquoise blue printout. I simply chose a solid colored background in Photoshop, and found 2 different fonts that I liked for the 'very' and 'merry'. They are held to the material background with...you guessed it...blue tack. And on went the buttons with blue tack. Easy, quick, and no mess.


I put my vintage bottles with the 1-minute DIY poinsettias on the table. But they looked a bit lonely.


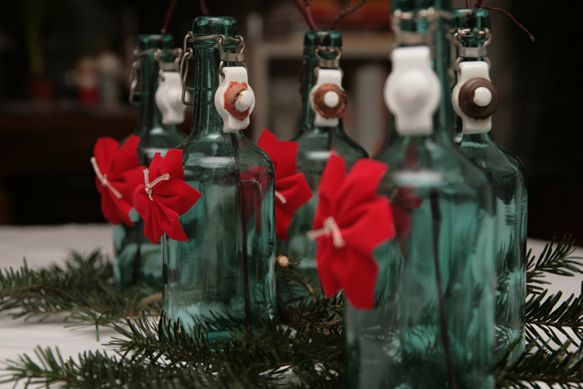
So I grabbed a bit of greenery from the bottom of our christmas tree and now they sit nice and nestled on the table. They might even get the surprise of some simple white flowers to hold.


When I pull back to get a photo of the entire area, it isn't quite the 'complete' picture that I want because of the things that still need remodeled or renovated. But, it's an improvement over what I started with and gives me a nice surprise punch of color for the holiday.


I've got one more DIY decoration that I'm determined to get up before Christmas day - so perhaps I'll have one more of these last-minute decoration posts. And because we don't really have to take down the Christmas tree until 20 days after Christmas in Sweden (a tradition called julgransplundring where friends and family dance and sing around the tree before taking it down), I'll have plenty of time to enjoy my last-minute holiday decorations. I'm not sure how many Swedes still adhere to that old tradition...but you can be sure we'll be holding out the full 20 days at my house this year.

Until next time...
Mike


Stumble this post

Tuesday, December 20, 2011

Reflections on Last Minute Holiday Decorating

This post is all about my reflections on last minute holiday decorating.

No...not those kinds of reflections. The real ones. Literally.


quick


A couple of days ago I talked with the Facebook crowd about the fact that I will still decorating for Christmas. While a lot of you are done (enviable), there are still a few of you who, like me, will be putting out decorations until the very morning of Christmas!  My first day of decorating was at the beginning of December. But then I had to shift focus to my day job - and WHAM! All of the sudden there was only 1 week left. So, I am still putting together a little bit of this and that each day, and as I do, I'll share in case there are any last-minute wanderers out there like me.

I had a pile of christmas balls that never made it to the tree this year, so instead of packing them up, I grabbed my trusty ring of flexible wire (I always have some on hand from the DIY store), and started stringing them up.


quick


quick


Once you get a few on, it will start to look like this as the balls naturally wrap around each other. One of these days I'm gonna regret holding my camera in one hand and stretching the arm to hold out something to photograph in the other. Not because I might pull a muscle (a real possibility), but because I'll probably drop the camera. Note to self...must enlist assistance when taking blog photos.


quick


Once I had all of the extra christmas balls strung on the wire, and I was in this pose that somewhat resembled the 'warrior' pose in yoga, my husband assistant walked up and offered his help. "Not because I think you're going to drop the camera," he said, "but because you look really uncomfortable."  I'm pretty sure he thought I was going to drop the camera.


quick


The funny thing is that I didn't have a place in mind of where I was going to put this string of christmas balls before I started. I've seen beautiful wreaths, but my wire was flexible and was not intended to hold the circle shape. No, I had plans of wrapping it somewhere. So I literally started walking around the house with the string in my hands. Around the glass vase? No. Nestled amongst the nutcracker collection? Nah. Wrapped around Lulu? Yes! I found the perfect spot. Remember my renovated vintage chandelier Lulu that is filled with glass baubles? She now has a beautiful new holiday outfit!


quick


I took off Lulu's light shades - they are going to get a revamp and I'm waiting for inspiration to hit. But doesn't the string of christmas balls suit her like a T?  I love how they look like they are just going to tumble down at any second. All I had to do was lay the wire up and over each arm, and then twist the two wire ends. Super simple. 


quick


It's another happy little color pop for the holidays! And all it took was 15 minutes, plus a few extra minutes for arm-stretching photo shots.


quick


See those frames with the black and white in the background? Come back tomorrow to see this ridiculously simple project.

Until next time...
Mike


Stumble this post

Sunday, October 16, 2011

What's That ?!

One of my favorite things is the discovery of a creation that makes me stop, stare, and say, "What's that ?!"

The latest comes from Christian Faur. Do you recognize what it's made from at first glance?


This should give you a good idea. Do you see it yet?


Yes, that's right. Crayons!


When I longed for that golden yellow box of 60 Crayola crayons at the start of each new school year, I never in a million years imagined doing this with them!


Don't miss Christian Faur's other crayon works of art - as well as his work in other mediums. You'll be amazed. And no doubt you'll stop, and stare. You may even ask, "What's that ?!"

Until next time...
Mike

Thursday, September 22, 2011

DIY Scrap Wood Art

It's time to pull all those pieces of scrap wood together because Janine at Salvage Love gave us just the right amount of inspiration to create our own DIY scrap wood art.


Her post comes complete with a how-to, so hop on over to have a look.

Until next time...
Mike


Stumble this post

Monday, September 19, 2011

Wreaths and Non-Wreaths

I must admit, I'm not a huge wreath person myself. But I do love the inspiration that comes in the form of the wreaths. I even keep a Pinterest wreath board to stash all of that inspiration. Each time I see a wreath that I really love, I'm always thinking "what else could be done with this idea". Like this wreath I found in the archives at Alisa Burke's blog (which I LOVE).


Alisa handpainted canvas squares, then cut circles and stitched them together before adding buttons and creating a wreath. I would actually love a bunch of those circles as a wall hanging...so the inspiration spark has ignited. 

Earlier this year I remember stumbling across a blog talking about "the non-wreath", and that really stuck with me. Kicking myself now for not marking it somehow so I could give credit where credit is due (if it was you, and you are reading this, let me know!). I must be a non-wreath kind of person. After all, I really like the idea of putting other things on the front door of our home. I just bought a really large rectangular frame (like 4 feet tall) at the thrift store this weekend and I'm thinking to myself..."do I dare to put this on the front door to our house with some type of decor inside of it? What will my conservative Swedish neighbors think?" Perhaps they will let this one slide since they've already seen me doing a range of odd things around the home?

Regardless of whether that big frame ends up on our front door or not, I've started to now collect "non-wreaths" on another Pinterest board, so let me know if you have one that I can add. Just leave a link in the comments below.

What's your style? Wreath? Or the Non-Wreath?

Until next time...
Mike


Stumble this post

Tuesday, September 13, 2011

A DIY Eureka! Moment

Today I had a DIY Eureka! moment. Unfortunately I don't get them near often enough. I see fabulous projects that others are working with and I get stuck because I don't have those supplies or that know-how. Today was a breakthrough and something finally clicked - I could use the inspiration from another's project and do it in my own way!

I don't know how to knit, but I am a HUGE fan of guerilla knitting and yarn bombs. Looking at these (usually very public) projects with every color of the rainbow makes me all warm and fuzzy inside. Yesterday, Sweet Peach blog posted about the Beltline Knitterati, and I was once again drawn into the happiness of the patterns and colors and community of this initiative.


As I looked out my own window at the bare trees in the backyard, I had a fleeting thought of "I wonder how long it would take me to learn to knit and do something like this." Now when I say fleeting, I really mean fleeting.  I have no patience for this handcraft, which is why I truly appreciate others who knit so beautifully. So, I sat and poured over those photos over and over again, until...

Eureka!  I can use old sweaters! They are already knitted, so the hard part would be done. But wait! Dang! I just weeded out my old sweaters at the end of the season last year - so I only have those I plan to wear this year. Hmmm, "It's a great idea and I'm sure it will work - and it is so 'me' to find ways to cut DIY corners", I say to myself as I start pilfering through some bags intended for the charity shops. Bingo! I pull out a colorful knit winter cap that my Aunt Bev made for the kids when they were babies.


They both wore the hat for several seasons, but now they are getting older and want to choose their own hats. I found the yarn strings that held the point of the hat and pulled it apart. Then I found the seam and took those strings out as well. What I was left with was a nice rectangle piece that would be perfect to wrap around a tree. 


But despite my excitement and determination to throw a 'yarn bomb', it wasn't going to be big enough to get around that tree out back that I can see from my window. So, on to plan B. What about that boring cement planter on the front steps that I never got around to mosaic-ing this summer? Yes, that will work. And I set about stitching up a back seam with a large needle and some embroidery floss. I stepped back to admire my guerilla knit exhibit.


It may not be the real deal, but it works for me! 


Aunt Bev has since passed, but I think she would be quite happy to know that her colorful little winter hat will now greet us each time we come home.

Now I've got plans! My next thrift store will definitely include sifting through old sweaters. I've got some trees that need some warm knit jackets for the winter! I can't wait!

Until next time...
Mike


Stumble this post

Also posted with some of my favorite link parties.
Related Post for bluevelvetchair.blogspot.com