Showing posts with label sewing. Show all posts

Sunday, February 26, 2012

DIY Tutorial - Recycled Tie Dress


Before we begin, don't miss the post this week with 33 inspirational recycled tie projects, and a few more at Pinterest.

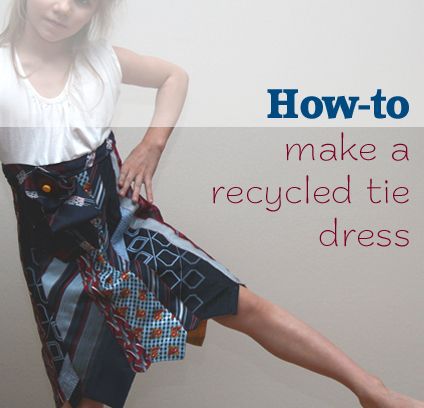
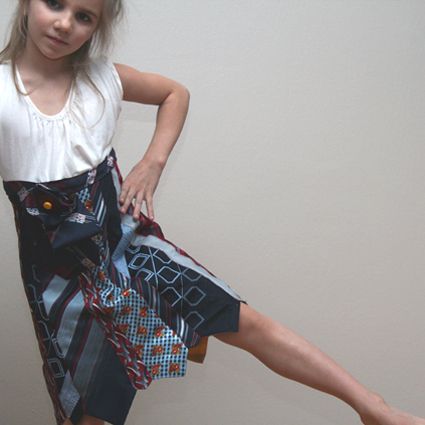
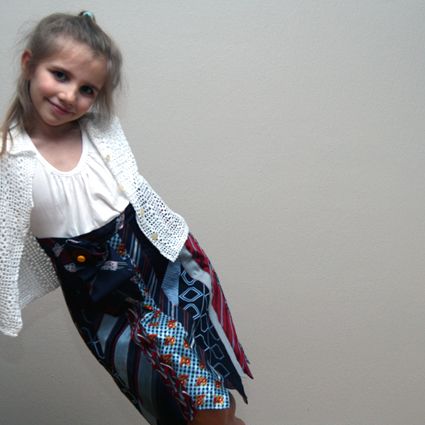
Last weekend I finished an experiment that had been on my 'must try' list for quite a while - a recycled tie dress for my Divine Little Miss M. And although it was a serious sewing hack, I'm quite pleased with the results...and so was M.

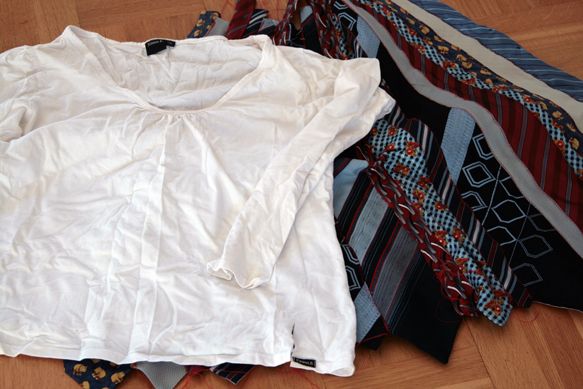
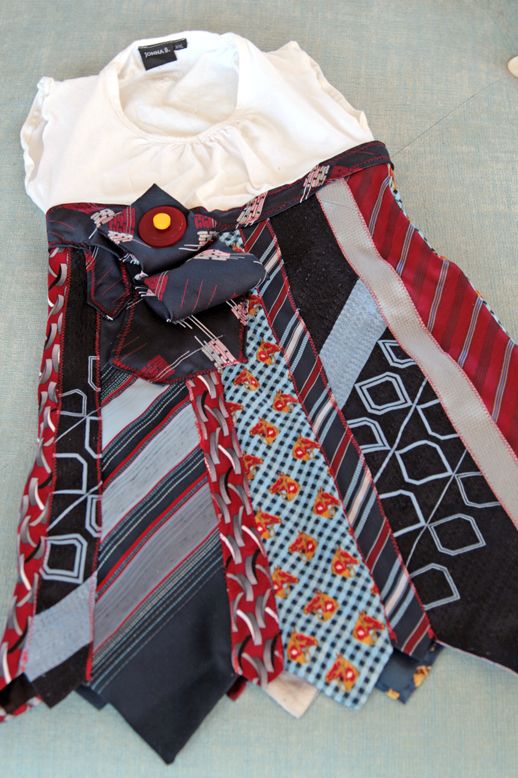
I promised a DIY tutorial for my recycled tie dress - despite the fact that I am far from a real seamstress. Before you start make sure that you've gathered a fun selection of used ties with similar color hues but different patterns. I chose blue and red as an overall color mood, but you'll see pops of gray and yellow as well. Several of the ties came from thrifting and a couple came from the closet of my friend's husband.  To give you an idea of the number of ties you'll need, this dress is for a 7-year old and I used 10 ties - 9 for the skirt and 1 around the waist where the ties and Tshirt are sewn together.

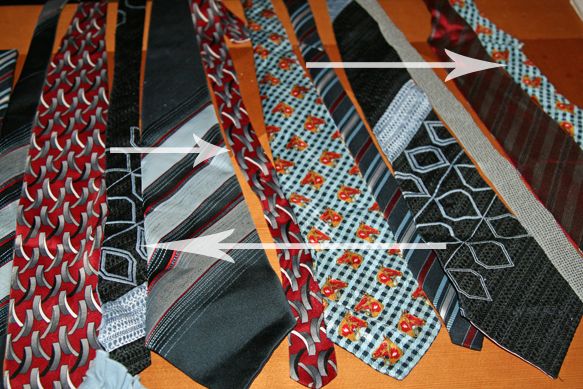
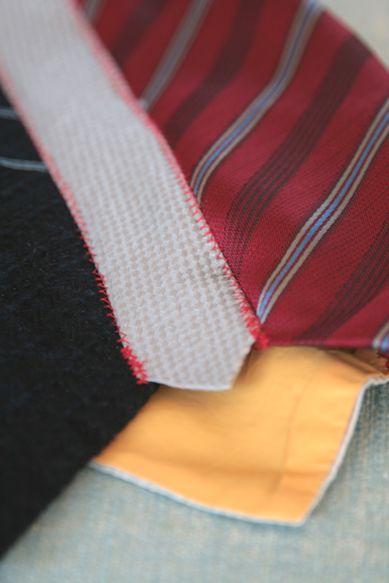
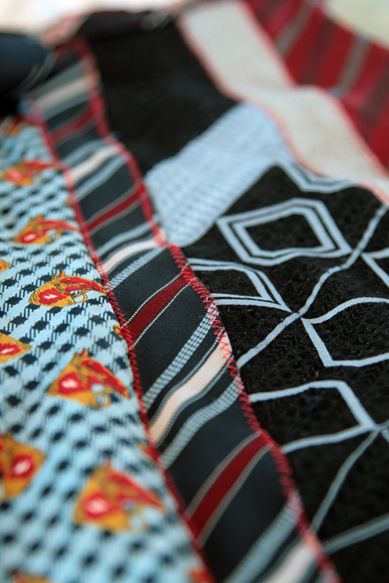
Cut your ties in half so that you are now working with a wider piece (front of tie) and a thinner piece (back of tie). I laid them out with alternating widths (wide, thin, wide, thin...) and mixing so that the matching backs were several ties away from the fronts. The nice thing is that the ends already have beautiful seams, so I left them as is and decided to sew the ties together side-by-side with just a very small amount of overlap (1/4 inch).


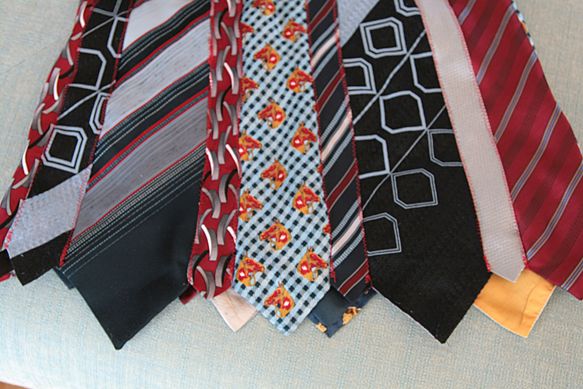
I pinned two ties together (both right side facing up with just a bit of overlap) and used a zigzag stitch on the '2' setting on the sewing machine. Then I pinned the next tie and did the same, continuing until I had enough to wrap around Little Miss M's waist. This is part of the hack - I don't use patterns and I do a LOT of eyeballing. Both sides of the thinner tie sections were always on top of the ties beside them, and I started sewing from the pointed end going upward. Because the front side of the ties are wider at the pointed bottom, it gave the natural A-line needed for the skirt to flare out a bit at the bottom.

I could have used a contrasting thread like yellow to give the skirt a more eclectic personality, but I chose to stay with the red and blue color mood, so I used a red thread - which still gave a nice effect against the ties. 


Now, if you remember my last sewing experiment with the sweater skirt made from recycled winter scarves, you'll know that I will do almost anything to avoid sewing a waist. I just don't know how to do it. So, to hack my way around it this time, I decided to take one of my old Tshirts that I had in the 'do something with this' pile, and I cut off the side seams straight up to the shoulders (cutting off arms as well). After another eyeball on Miss M to see how much the V-neck needed to be lifted, I sewed a new seam across the shoulders, sewed new side seams, and created a seam around the new arm holes. And because I don't know the proper seams to use with Tshirt material, I always seem to get that slight ruffled effect (at least I tell myself it's a ruffle effect). Does anyone know the right seam and stitch size to get a flat seam on Tshirt material? PLEASE tell me!


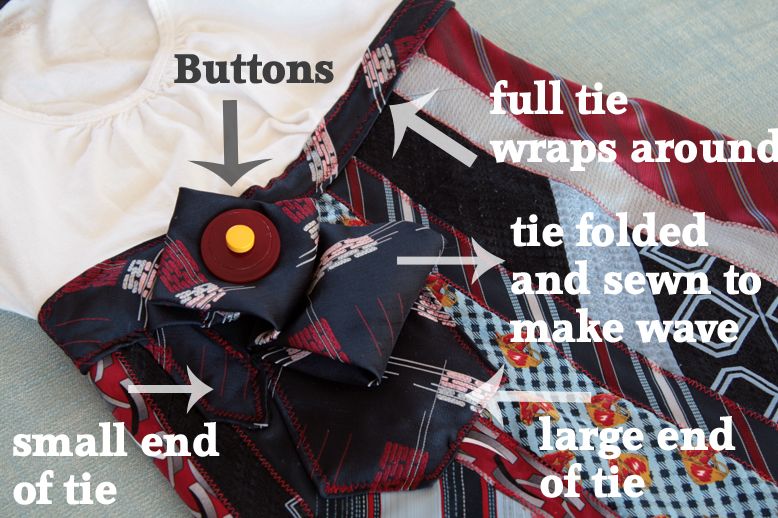
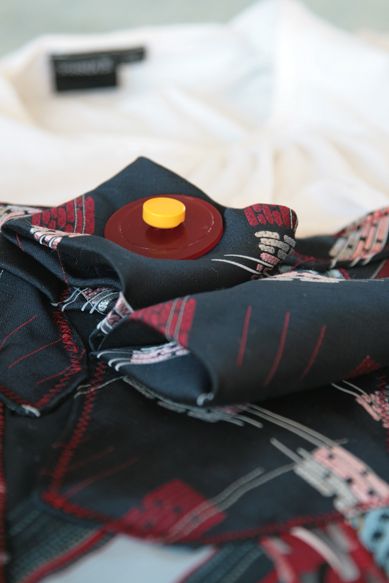
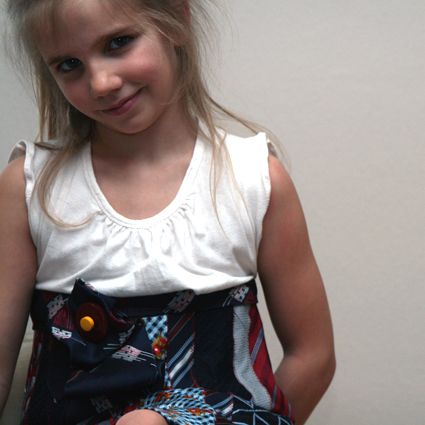
Next I just tucked that downsized white Tshirt down inside the tie skirt and sewed a zigzag seam right along the outside. I first thought that I was going to leave it with the seam exposed, but decided to give it a more 'finished' look by taking one more tie and wrapping it around the waistline. Then I simply zigzagged both sides of the tie all the way around. On the front side, I created a little 'free-flow' design with the ends of the tie and just sewed across the tie underneath each fold. I finished the little free-flow design by sewing on two buttons.


That free-flow design was inspired by the great recycled tie creations at Ties & Whimsy in Australia, so make sure to check those out if you plan to do anything for yourself.


And there you have it. This tutorial is about as hacked as the sewing job was, but I hope it gives you enough of a hint and enough inspiration to try your own.

One thing I would change if I were a better seamstress would be the upper part of the dress. The tie skirt is quite heavy compared to the Tshirt material up top and it pulls on it just a bit too much. This dress would be perfect with a white button down upper part - and if I knew how to downsize a man's button down to a kid's button down like this one below from Dana Made It, I think that would have made this recycled tie dress even better (I would only need the upper part of this re-do below).


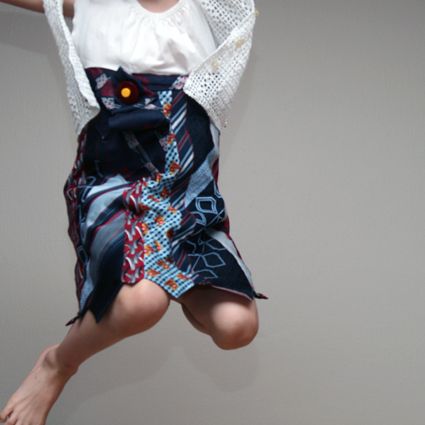
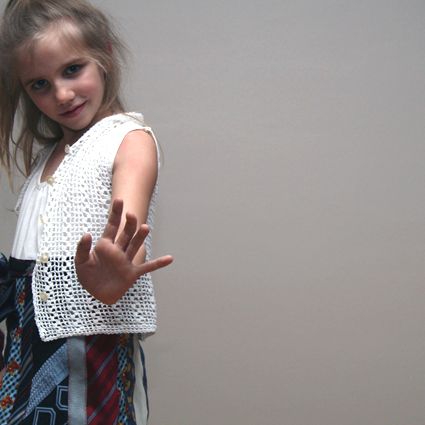
But, all that aside, Divine Little Miss M was pleased with her new dress experiment - and she gave it a whirl to make sure that all parts were working.


Don't miss the post earlier this week with over 30 inspiring ideas of what to do with recycled ties. There is something a bit luxurious about tie fabric and patterns, and there are some great projects out there to try.

Until next time...
Mike


Stumble this post


I'm also partying at these fun linky parties!

Wednesday, February 22, 2012

Sewing Hack Experiments - Recycled Ties

Pin It


Here's a quick peek at what was happening over at our place this past weekend. It involved another sewing hack experiment - this time with recycled ties. Watch for a mini how-to tutorial later this week.


If 'sewing hack couture' is your thing, there are a few more projects to check out on my project gallery wall that were also created for the Divine Little Miss M.  And since I've been sharing these projects and my affinity for sewing hacks, there have been many of you who've joined me to raise our voices for sewing on the edge. It's never perfect. But it's always perfectly us!
Are you ready yet to try a sewing hack?

Until next time...
Mike


Stumble this post

Tuesday, February 7, 2012

Recycled and Repurposed Winter Scarves

Checked off my list this past weekend:
Make Divine Little Miss M a funky little skirt from recycled winter scarves.


Pin It


This gave her plenty to jump about...


...and plenty to dance about.


Check out the tutorial that shares all my secrets about hacking my way through this sewing experiment to create a funky little one-of-a-kind winter skirt for my one-of-a-kind little chica.

Did you see my other sewing experiments from 2011?
-Vintage silk souvenir scarf dress (this was my favorite last year)
-1 Shirt repurposed to girl's dress and leg warmers
-3 recycled Ts become 1 graphic girl's dress

Real seamstresses beware! My hack sewing methods are not for the faint of heart! See that little pink shrug she's wearing around her arms? Those are the leftover legs from a too-short pair of leggings. More on that with the how-to tutorial.
Until next time...
Michael


Stumble this post

Tuesday, October 11, 2011

Recycled Sweaters and the Amazing Technicolor Dreamcoat

Serious jaw drop! Don't you just love it when someone takes recycling and repurposing to a whole new level? Cat with Fairytea in Kilkenny, Ireland, has done just that with her recycled sweater creations - perhaps Joseph's Amazing Technicolor Dreamcoat was repurposed? Here are some of my favorites...brace yourself!


And finally...think fairytale wedding!


Okay, so I had problems choosing just a few favorites. But seriously! 

They are for sale - and all I can say is...I know what I'm asking Santa Clause for this year!

And to give more credit where credit is due, Fairytea credits their inspiration to the original sweater coat creations of Katwise in the States...can you say C-O-L-O-R?

Until next time...
Mike


Stumble this post

Saturday, June 25, 2011

How to Sew a Vintage Scarf Dress and Save the World - Part III


(för svensk versionen, se nedan)

It's my third go at making my daughter a repurposed summer dress - albeit the word 'summer' is a relative term in Sweden given our current temperatures of about 60 degrees (15 celcius).

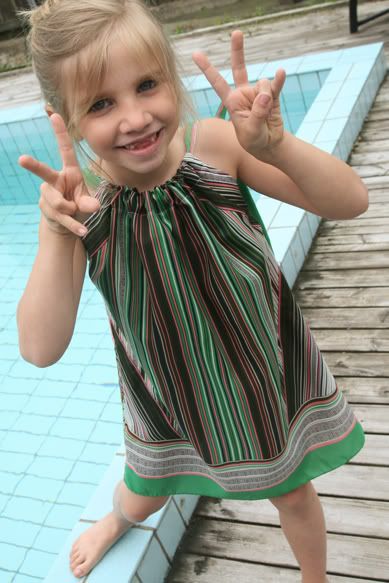
I am absolutely thrilled with the result...and I think it is the first time in my life that I am halfway thinking that maybe I can sew after all! If you have seen my  "How to sew a dress and save the world"  experiment with M's summer wardrobe (part I and part II ), then you'll know that my style of sewing has been more about kamikaze and less about formality. But this time I stumbled across a fabulous video tutorial from The Crafty Gemini and she led me right through the process of making professional seams...easy-breasy.And I love her for it!

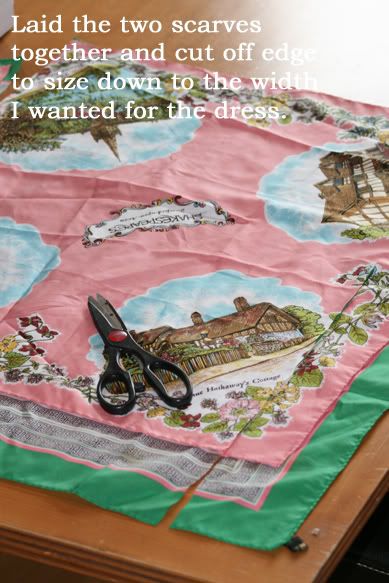
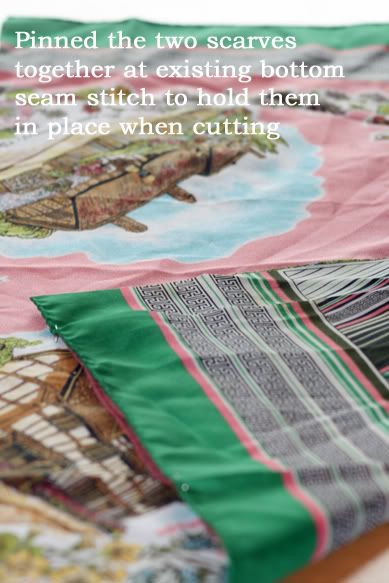
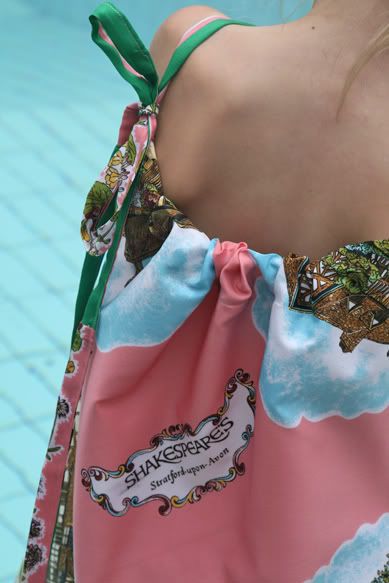
In my continued efforts to use what is already out there in the world, I found two scarves (2nd hand) that I thought had a nice complimentary color scheme. Plus, I have a weakness for souvenir scarves - you know, the ones that have tourist sites and the place printed on them? I really want to make some pillows out of them sometime. Ok...focus! Back to the dress.


I chose to imitate one of those pillowcase dresses that have been all the rage these past years...adding my own sense of kamikaze sewing to the process of course. They seemed simple enough for an amateur like me. My cuts are all still done by eye (because I can't be bothered with the measuring stuff), but this time I did use more pins to keep the materials in place while I sewed...a big step forward on my part towards better sewing methods.


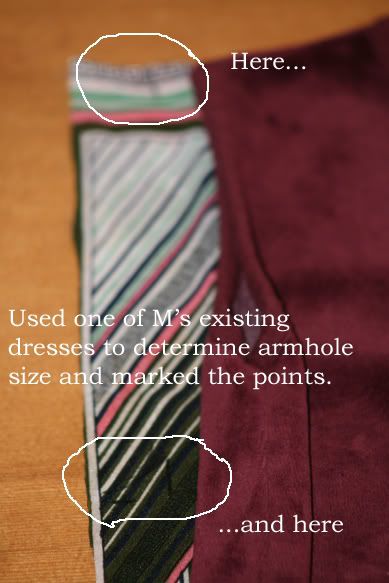
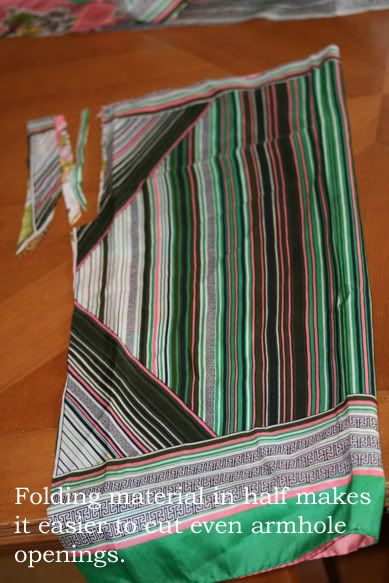
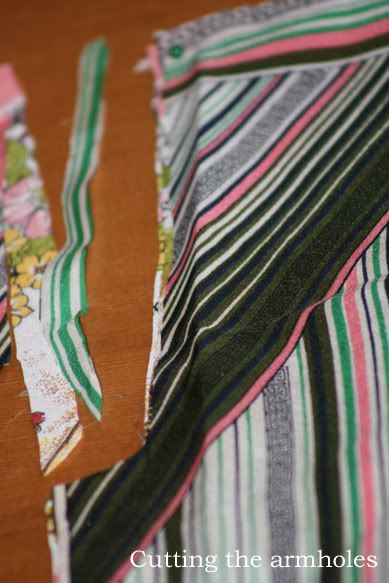
Find any easy-to-follow instruction for making a pillowcase dress and use that as your basic pattern. I used one of M's existing dresses and laid it on my scarves to determine where to cut for the underarm seams.


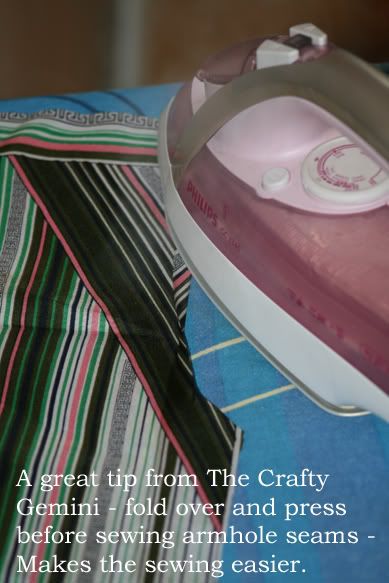
Then it was a quick watch of The Crafty Gemini's video on how to sew a french seam. Thank you, Vanessa! You really upped the anty for my project. I won't go through the details on this - but instead invite you to watch the video to see for yourself how I tackled all of the dress seams.

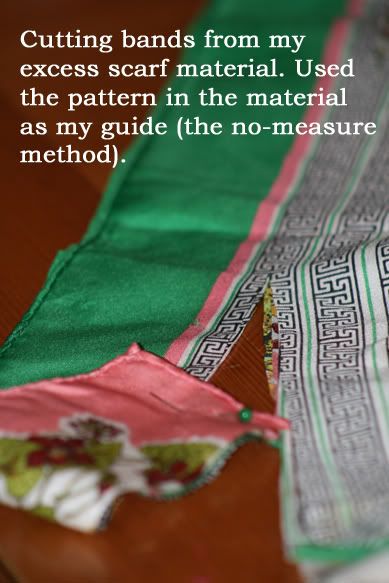
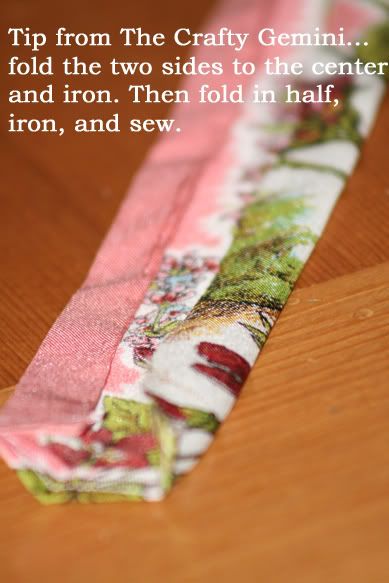
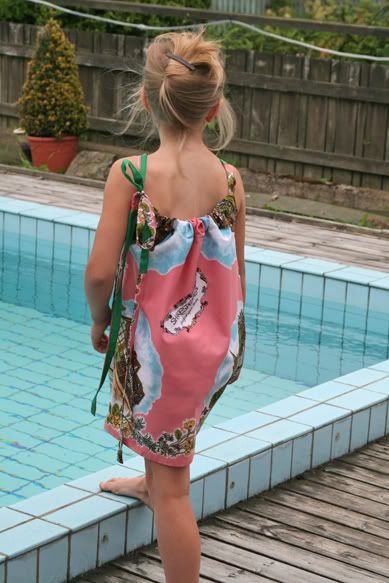
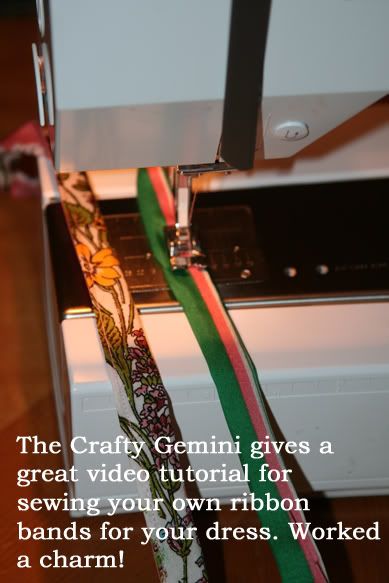
The Crafty Gemini also had another video where she made her own straps for her pillowcase dress (instead of using the traditional ribbon). Well, not being able to let my cut scraps from the scarves go to waste, I used her video to make my own coordinating ribbon for the dress. Yeehaw! Worked like a charm with the exact effect I was hoping for...long flowing ties on the dress.


My kamikaze style in this dress comes in the fact that I wanted the back side to be lower than the front...so I chopped off some inches on the scarf that would be on the back before I started sewing any seams.

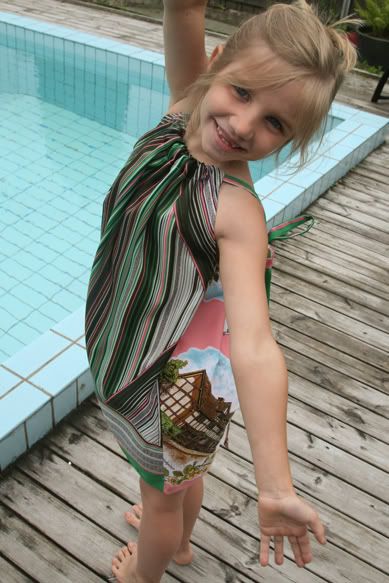
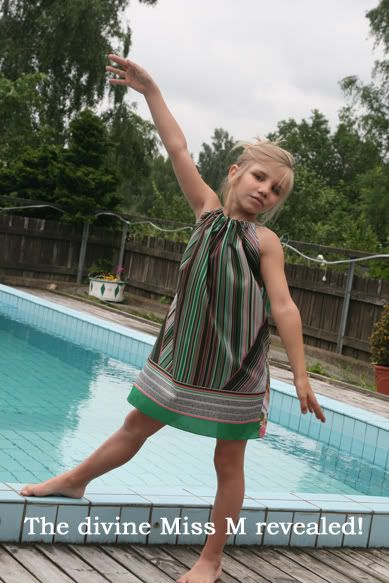
The result? A silky summer dress for M that has the perfect amount of 'flow' to it - no stiff fabrics on this one. And I absolutely LOVE the souvenir scarf surprise on the back side. Now I'm trying to figure out how to get one of these for myself!


Until next time...
Michael

p.s.  If you enjoyed this post, I hope you'll become a follower of my blog and a fan on FB.

http://www.facebookloginhut.com/facebook-login/


Detta är tredje gången att göra min dotter en repurposed sommarklänning - även om ordet "sommar" är relativ i Sverige med tanke på vår nuvarande temperaturer på cirka 15 grader.

Jag är absolut nöjd med resultatet ... och jag tror att det är första gången i mitt liv som jag tänker att jag kanske kan sy i alla fall! Om du har sett min "How to sew a dress and save the world" experimentera med M: s sommar garderob (del I och del II), då vet du att min stil har varit mer om kamikaze och mindre om formalitet. Men den här gången snubblade jag över en fantastisk video tutorial från The Crafty Gemini och hon ledde mig igenom processen att göra professionella sömmar ... lätt och snabbt. Och jag älskar henne för det!

I mina fortsatta ansträngningar att använda det som redan finns där ute i världen, hittade jag två halsdukar (secondhand) som jag trodde hade en fina färgschema. Plus, jag har en svaghet för souvenir halsdukar - ni vet, de som har turistattraktioner och platsen tryckt på dem? Jag vill verkligen göra några kuddar av dem någon gång. Ok ... fokus! Tillbaka till klänningen.

Jag valde att imitera en av dessa örngott klänningar som har varit i ropet de senaste åren ... att lägga till min egen känsla av kamikaze sömnad till processen förstås. De verkade enkel nog för en amatör som mig. Mina nedskärningar är alla fortfarande görs genom ögat (eftersom jag inte orkar med att mäta saker), men den här gången användade jag fler pinnar för att hålla materialet på plats medan jag sydde ... ett stort steg framåt från min sida mot bättre sömnad metoder.

Hitta en lätt instruktioner för att göra ett örngott klänning och använda det som grundmönster. Jag använde en av M: s befintliga klänningar och lade den på min halsdukar för att avgöra var att klippa till underarm sömmar.

Då tittade jag på The Crafty Geminis video om hur man syr en fransk söm. Tack, Vanessa! Du höjde verkligen mitt projekt. Jag tänker inte gå igenom detaljer om detta - men i stället inbjuder dig att titta på videon för att se själv hur jag tacklas hela klänningens sömmar.

The Crafty Gemini hade också en annan video där hon gjorde sitt eget band för hennes örngott klänning (i stället för den traditionella band). Tja, att inte kunna låta min klippa rester från halsdukar gå till spillo, brukade jag hennes video för att göra mina egna samordna band för klänningen. Yeehaw! Fungerade som en charm med den exakta effekten jag hade hoppats på ... långa flödande band på klänningen.

Min kamikaze stil i den här klänningen kommer i det faktum att jag ville ha baksidan vara lägre än framsidan ... så jag högg några inches på halsduken som skulle vara på baksidan innan jag började sy några sömmar.

Resultatet? En silkig sommarklänning för M som har den perfekta mängden av "flow"  - inga stela tyger på den här. Och JAG ÄLSKAR absolut överraskning souvenir halsduken på baksidan. Nu ska jag försöka lista ut hur man får en av dessa för mig själv!

Tills nästa gång ...
Michael

p.s. Om du gillade detta inlägg, jag hoppas du kommer att bli en 'follower' av min blogg och ett fan på FB.
http://www.facebookloginhut.com/facebook-login/


linked to these great parties and:

Stay At Home Nation

Sunday, June 12, 2011

How to Sew a Summer Dress and Save the World (DIY) - Part II


Summer dress #2 is now complete.

I was just about to send away an old shirt that was too small for me. But I just love the pattern because it’s filled with American images and feels like home (even though the shirt was purchased here in Sweden). 


What was I thinking? It would make a cute little summer dress for Mia (which seems to be my first thought for every piece of clothing I get rid of right now). Time to pull out the borrowed sewing machine and open my stash of knitted doilies that I collected a while back with good intent to decorate some funky clothing items for my little half-breed chica.


Because I have no sewing training, and because I have very limited patience for prep work, I once again did everything by eyeballing it instead of any serious pattern measurements. Big tip: using as many existing seams as possible goes a long way with my kamikaze sewing style.

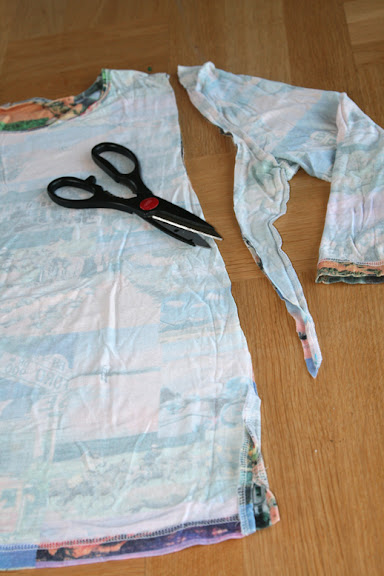
It was pretty straight forward. Figure out how wide you want the straps of the dress to be, and set a pin there. Then cut from that point down towards the bottom of the shirt, creating an A form. Again, I just eyeball it.


Then I put another pin at the point that would be the bottom of the armhole. I folded over enough to make a seam and stiched around what would become the armhole area. Then, with the material wrong side out, I stiched from the armhole down the side to the bottom seam - which was already done as it was the original bottom of my shirt. Repeat same thing on other side. In the end it is a no-fuss A-frame girl’s dress.


But it’s missing something. Embellishments! In come the doilies. I tried laying a few different colors, sizes and patterns on the dress to see what fit best. These doilies were all picked up cheap at 2nd hand shops, so I’ve created a nice little stash to choose from.


In the end I chose a layered effect. The bright blue is actually an old-fashioned knitted dishcloth (properly disinfected in my washing machine, of course). With a cute little crocheted (I think) white doily accented with a couple of buttons from my collection.


I couldn’t just throw the arms of the shirt away, so I stiched a seam on the cut end and voila! A pair of matching little leggies.


I have a feeling that Mia’s summer wardrobe is going to be quite the experiment for me. Thank goodness she doesn’t mind being the guinea pig!


Until next time...
Michael

p.s.  If you enjoyed this post, I hope you'll become a follower of my blog and a fan on FB.

http://www.facebookloginhut.com/facebook-login/
Related Post for bluevelvetchair.blogspot.com