Showing posts with label tutorial. Show all posts

Tuesday, February 7, 2012

Tutorial - Recycled Winter Scarves Reborn as Skirt


Warning! This is a hack sew job - I'm a seamstress wanna be who doesn't have a clue...but I like to experiment. So don't take this tutorial too seriously if you are obsessed with clean lines and perfect stitches. But, if you are like me and like things to be a little bit wonky sometimes, go ahead and give it a try!

I didn't have a pattern so I cut the winter scarves into equal lengths of 3 or 4 pieces (depending on the length of the scarf). Then I just eyeballed a length with Little Miss M and cut each of the pieces into this kind of a shape.


I don't have a proper serger sewing machine to make this kind of fabulous upcycled sweater coat creation, so I picked a stitch that I thought might work. It gave a quirky external seam with a slight ruffle effect to the edges, and I was plenty pleased. 

Once I got 6 panels sewn together, I held it around Little Miss M and eyeballed, decided to add 3 more panels, and finished both the bottom and the top with a zigzag stitch. That's about the only thing I know about sewing - if you use a zigzag stitch, it allows for stretching (Thanks, Marie, for that tip).

This next step is what generally keeps me from starting sewing projects. I have a waistline phobia. I just don't understand how to sew them to look 'good'. So I did what I knew how. I hacked the waistline by cutting off the perfectly good elastic waistline of a too-short pair of M's leggings, and I sewed the sweater skirt to the jersey waistline. Perfect! Or at least perfect for me :-)

I was so happy with the funky little diva skirt. And here's where the story takes another happy twist. Mia looked at those legs that were left from the leggings I chopped up. They were still connected by the seam that ran through the crotch area. Well without saying a word, she whipped an arm into each leg and said "I can wear these like this" - and she had created an instant arm shrug. I can't even tell you how proud I was of her in that moment for seeing something that I had already cast aside as unusable (it was destined for the rag box) and finding new opportunities for reusing and repurposing. It's those moments that I realize that my passion for creating with recycled and repurposed items is actually having an affect on the way my children look at how to use things. I'm leading by example and I don't even have to say a word about recycling and reducing our imprint - I just have to keep creating as I do now. They are evidently getting the message loud and clear. And that makes me so happy.

We added some leftover sweater scraps from the scarves to the arm shrug to pull the look together. Then we got out one of her thrift store purple Ts, and poof! We had a fun and funky little bohemian outfit.

Like I said at the beginning, this tutorial isn't for everyone - but I do hope it inspires you to try something with recycled winter scarves. After all, they will be on sale soon in a thrift store near you!

Until next time...
Mike


Stumble this post


Inspiration for this project came from this photo.

Friday, December 16, 2011

12 Days of Christmas

This post originally posted at Two Girls Being Crafty for the 12 Days of Christmas blog party.

When I'm decorating for the holidays I have two things in mind...how can I do it on the cheap and how can I reuse what I already have. Today I'd like to share my table 'centerpiece' that is a bit thrift, a bit recycle, and a bit creating something new.


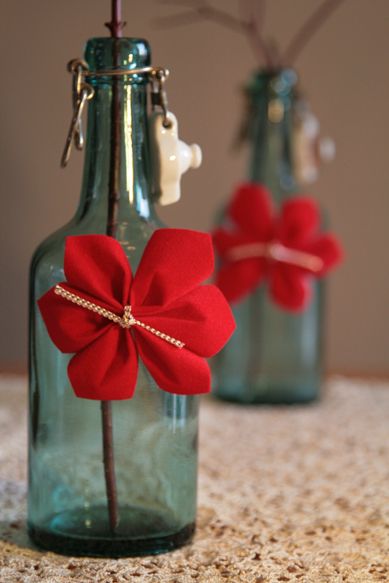
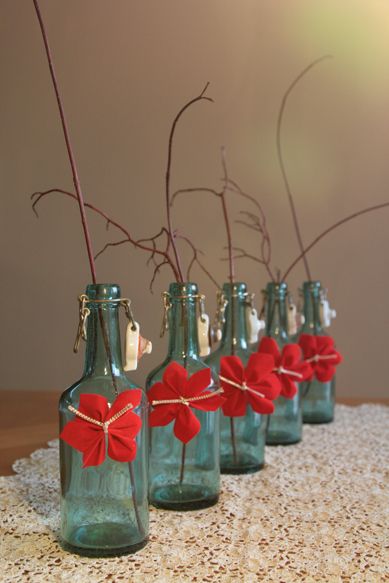
Back in May, I picked up some antique turquoise bottles from the early 1900s during a thrift store run. They became the perfectly understated centerpiece for our Thanksgiving dinner with friends when I added some simple red-colored twigs that a neighbor had trimmed from their shrub. So now we have the thrift bit.


The recycle begins when I decide to use these same bottles and twigs for my Christmas table decor. But what could I do to add some holiday cheer?  Create a little something new to add to the bottles.


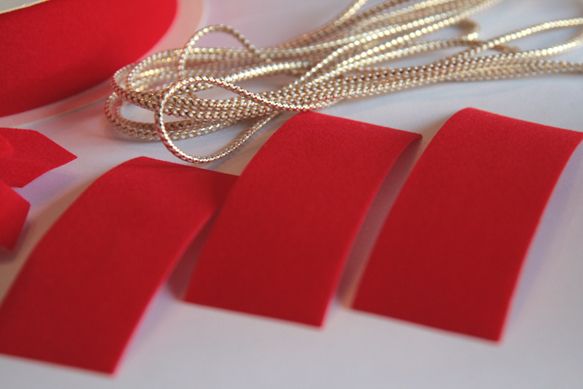
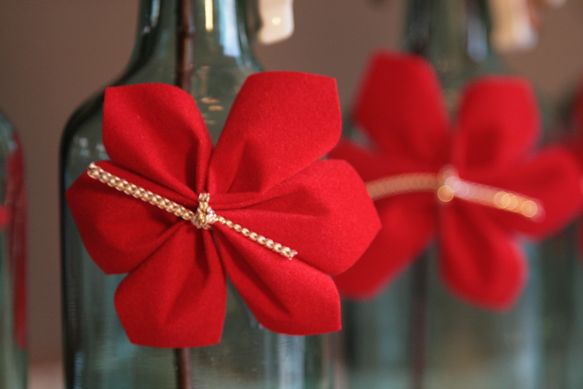
Now I'd like to share how to DIY your own little poinsettias to add 'instant holiday cheer' to something you already have that can be recycled as Christmas decor. I used an old roll of red velvet ribbon (this stuff seems to last forever!), some gold braided ribbon, and scissors. Simple.


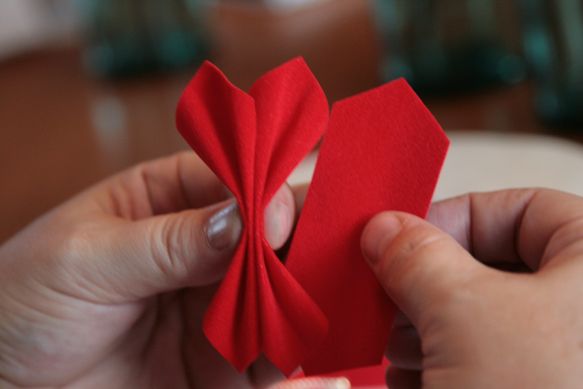
Cut three strips from the red velvet ribbon. Mine were about 3.5 - 4 inches long (about 10 cm).


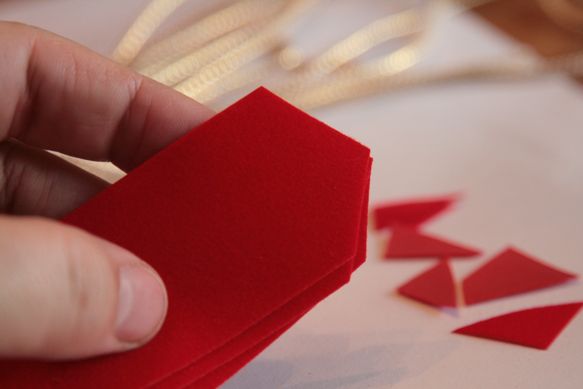
Cut the tips of the ribbon as shown below.


Here's where I wish I could show you via video (maybe I can make one quick and post later at Blue Velvet Chair). Press in the center of the ribbon with your thumb,while you use your pointer fingers to fold down the outside edges. I hope the photo below shows this well for you. So the center and the two outer edges are all folded downwards.


Because you want to put three of these together, you'll have to hold the first two between your thumb and pointer finger on one hand while you use the other hand just beside to create the next folds.


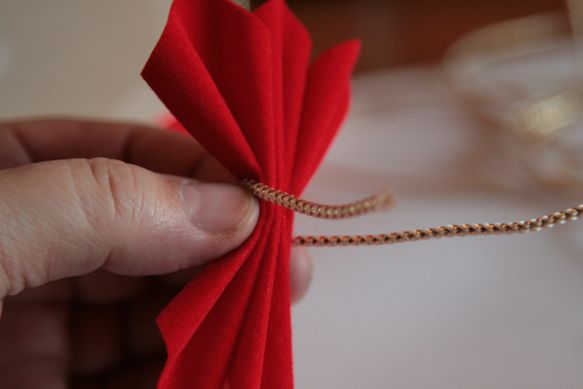
There. All three folded and held in a pinch. This process (folding the three pieces of ribbon) literally takes a total of 1 minute max.


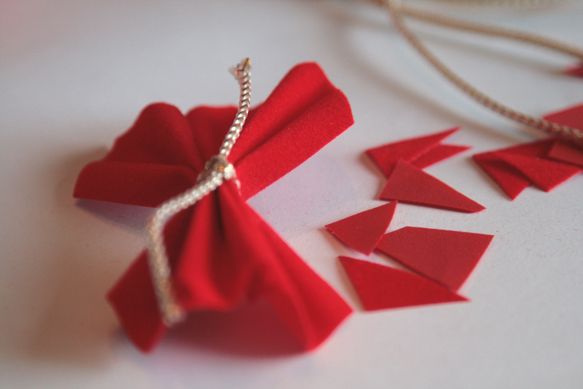
Take a (pre) cut piece of the braided gold ribbon - or use whatever you have around - and tie around all three 'petals'.


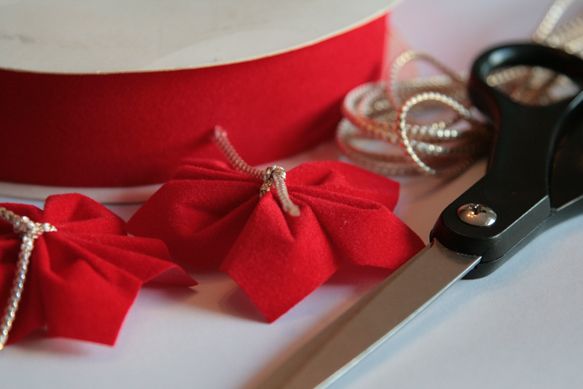
It will look like this once you get it tied and knotted.


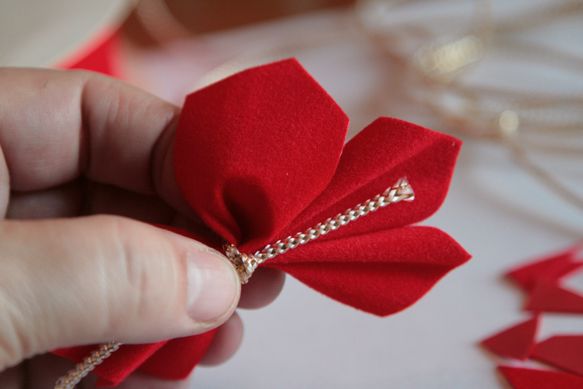
And now time to create the poinsettia! Simply take your pointer finger and push from the bottom near the knot in order to 'spread' each petal. This will create the roundness of the flower due to the stiffness of the red velvet ribbon.


Ta dah!  Your own little DIY poinsettia flower. I promise these little pops of holiday cheer can be added to almost anything and you'll get some fun results.


I just love the contrast of them against my old turquoise thrift bottles. This color combo works so well because they are contrasting colors on the color wheel.


Happy holiday cheer.


Happy happy.


Happy holidays to you all.


There you have it. Mere minutes to create your own little recycled-thrifted-creating something new holiday cheer.  My dream project is to create a big beautiful wreath full of these little beauties. My sister made one back in the 90s, and I've been wanting to create one ever since. 15 years should be enough time for the idea to simmer...don't you think?

If you'd like to see some more of my hybrid style holiday decor, you are welcome to visit Blue Velvet Chair. We'd love to see you there!

Happy Holidays everyone!

Michael


Stumble this post


Party!
Mad in Crafts

Wednesday, November 30, 2011

Make It Merry - 14 Days and 14 DIY Ideas

It's my turn to show and tell for the Make It Merry event - 14 days and 14 DIY ideas for the holidays! This is day 6, but it's not too late to catch up with the previous ideas by clicking on the calendar at the bottom of this post. Inspiration abounds and I promise you won't be disappointed by the projects posted by my fellow bloggers from the Make It Merry event.

Here's the sneak peek at my "Forest Funky" advent calendar that I'll be featuring today.


Just a bit of logistics. I've got so many photos for this project so I hope that everyone can easily load this post. I'll also post all the photos on the Blue Velvet Chair facebook page if you're interested. And now, time to show and tell!

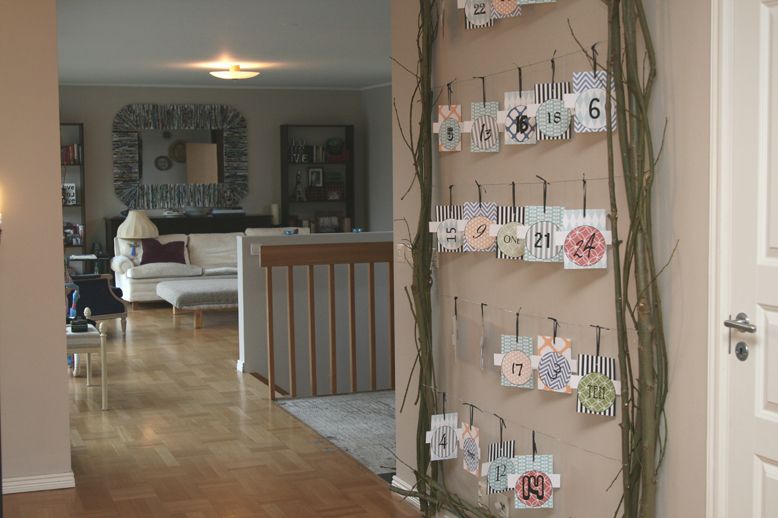
When my kids started to ask for their typical annual advent calendars this year, I suggested that we make a big one for an empty wall in our dining area. They jumped aboard and I'm so glad they did, because this one also doubles as holiday decor. It all started with a pretty good pile of twigs and branches collected from the forest - there's no shortage of forest in Sweden - some screws, and a drill used as a screwdriver.


My dining room floor became my workroom and I grabbed the largest branches to make a frame which I screwed together at the corners. Then I began weaving smaller branches in and around the main branches that formed the frame. No more screws, no glue, just weaving and twisting.


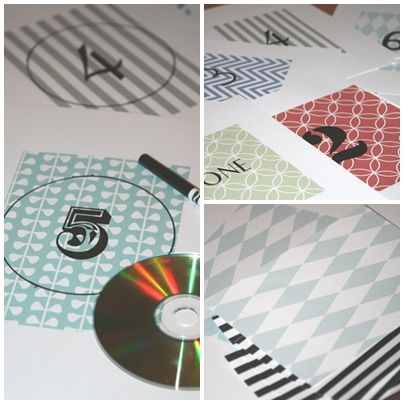
Next I headed downstairs to print out some fun numbers and backgrounds. I decided to use the free backgrounds by Aimee at Sprik Space. I mentioned these backgrounds a couple of months ago when I made some business cards for a market, and I like them so much that I decided they would be perfect for our forest funky advent calendar.


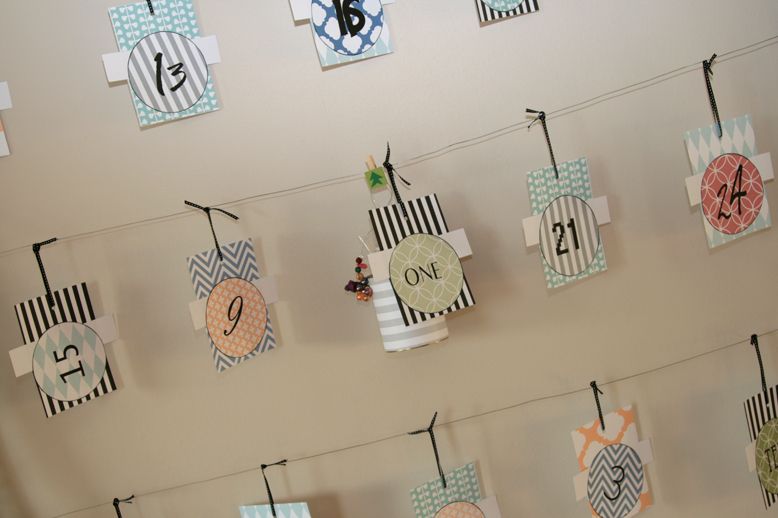
I used Photoshop to print numbers in different fonts on the backgrounds from Aimee after I resized her files to a 5x7 size (A5 for the Europeans), and then used a CD to draw a circle around the numbers. There's no Silhouette in this household, so off I went to cut the circles out by hand. If you cut on the outside of the black line there will be a little black border left on the circles to give that extra accent. I also printed some 5x7 backgrounds without numbers and used them as the backdrop for the circles. I arranged everything on the floor to get the right colors and balance before I started gluing.


After a big of gluing and punching holes in each card (single hole punch), I used a nice little black and white ribbon to string the dates randomly on the forest frame.


Now my forest funky advent calendar was almost done...and just in the nick of time (since it starts tomorrow)! Here's how the kids will see it...


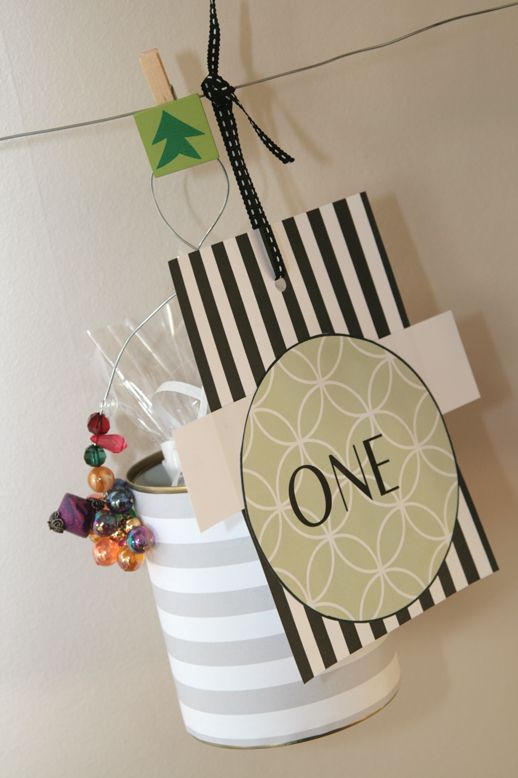
But what about the little surprises? Well...I have a son who just can't resist a good peek when given the chance. So instead of hanging all the little goodies on the advent calendar at once, I've made a little traveling surprise carrier that will move from day to day according to the date. All you need is a tin can, one of the printed backgrounds, a bit of ol' wire and some beads. I started with buttons (as you see in the supplies photo), but wasn't getting the effect right, so I switched to beads.


I don't know about your kids, but mine are at the age where they are really curious about their baby photos and what they did when they were younger. So several of the dates on the advent calendar this year will hold a little gift of memories from previous Christmas holidays. Day 1 includes a little packet of mini photos that I printed out for them to have - they can carry them around, bend them, put their little fingerprints all over them, and do the things that kids normally do with photos that we parents cringe over. This is their own little set. They show our Christmas from 2008 when we flew to the Canary Islands for a sunny getaway during Sweden's dark winter. It was one of our best Christmas holidays ever!


OK. Snapped back to reality!

Their first little surprise packet holds Christmas memories - and of course a little something sweet.


Wrap up the little goodies in some cellophane paper for the traveling carrier. To make the carrier, simply glue the paper to the can, string the beads on your wire, punch a couple of holes in the sides of the tin can, and you'll be able to figure out the rest.  


Held by a little clothes pin, the traveling carrier will have new surprises on each date when the kids wake up.


And there you have it. The forest funky advent calendar. 


Couldn't let the scraps go to waste from the circle cut-outs, so I cut some pieces and made a paper mosaic tree for the bottom of the advent calendar.


The forest frame will also double as our Christmas card holder this year.


Whew! Just one more photo to go. I hope that my forest funky advent calendar gives you a little inspiration to create something special and 'uniquely you' this holiday season. 


Click through for more inspiration on the Make It Merry graphic below.

And a big thanks to Diane at Home Sweet Homemade for putting together a fabulous event filled with inspiring creatives. Diane has been a big part of my own inspiration for button flowers and rolled magazine pages.

Until next time...
Mike

Stumble this post


Nifty Thrifty Things
home sweet homemade
Project Possessed
Blue Velvet Chair
homework
Meridian Road
Modern Country Style
Truly Lovely
Jill Ruth & Co.
Rustique Art
hello lovely inc.
Decor to Adore
Inspire Me Heather
Ladybird Ln
Image Map

Monday, August 29, 2011

80+ Best DIY Paint Chip Projects

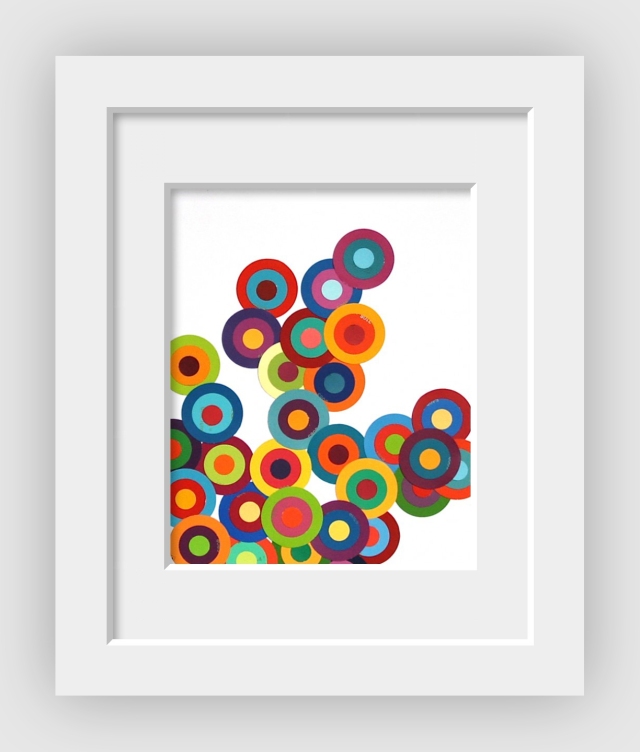
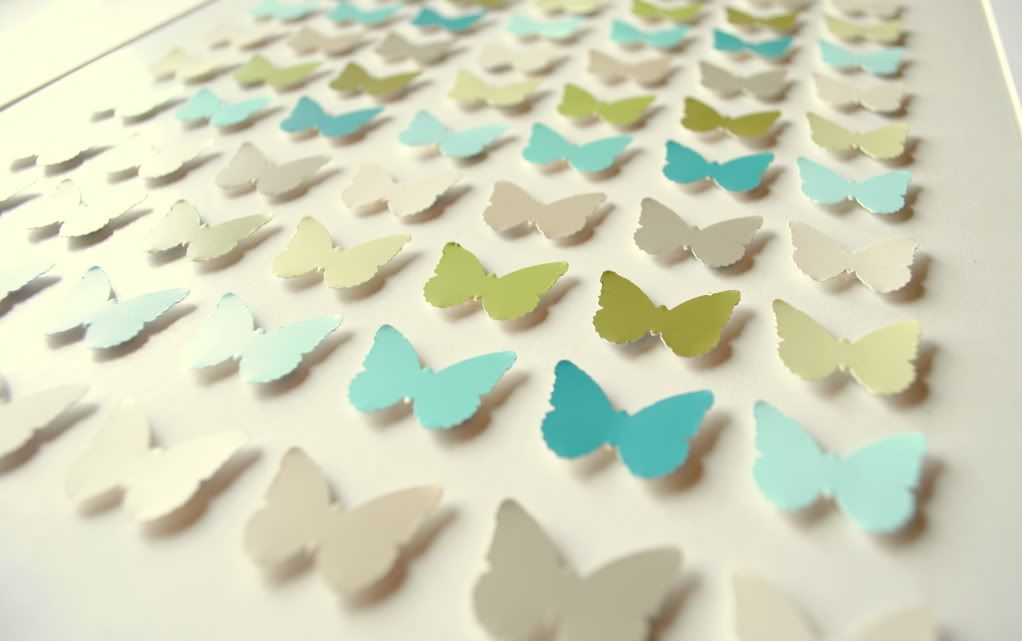
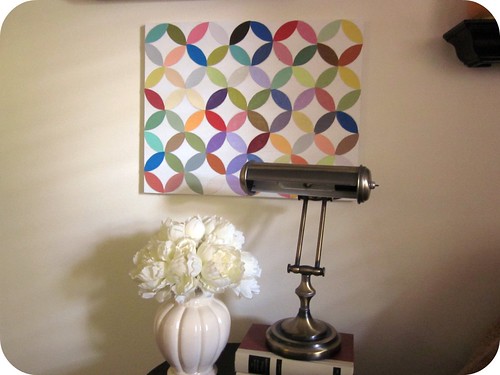
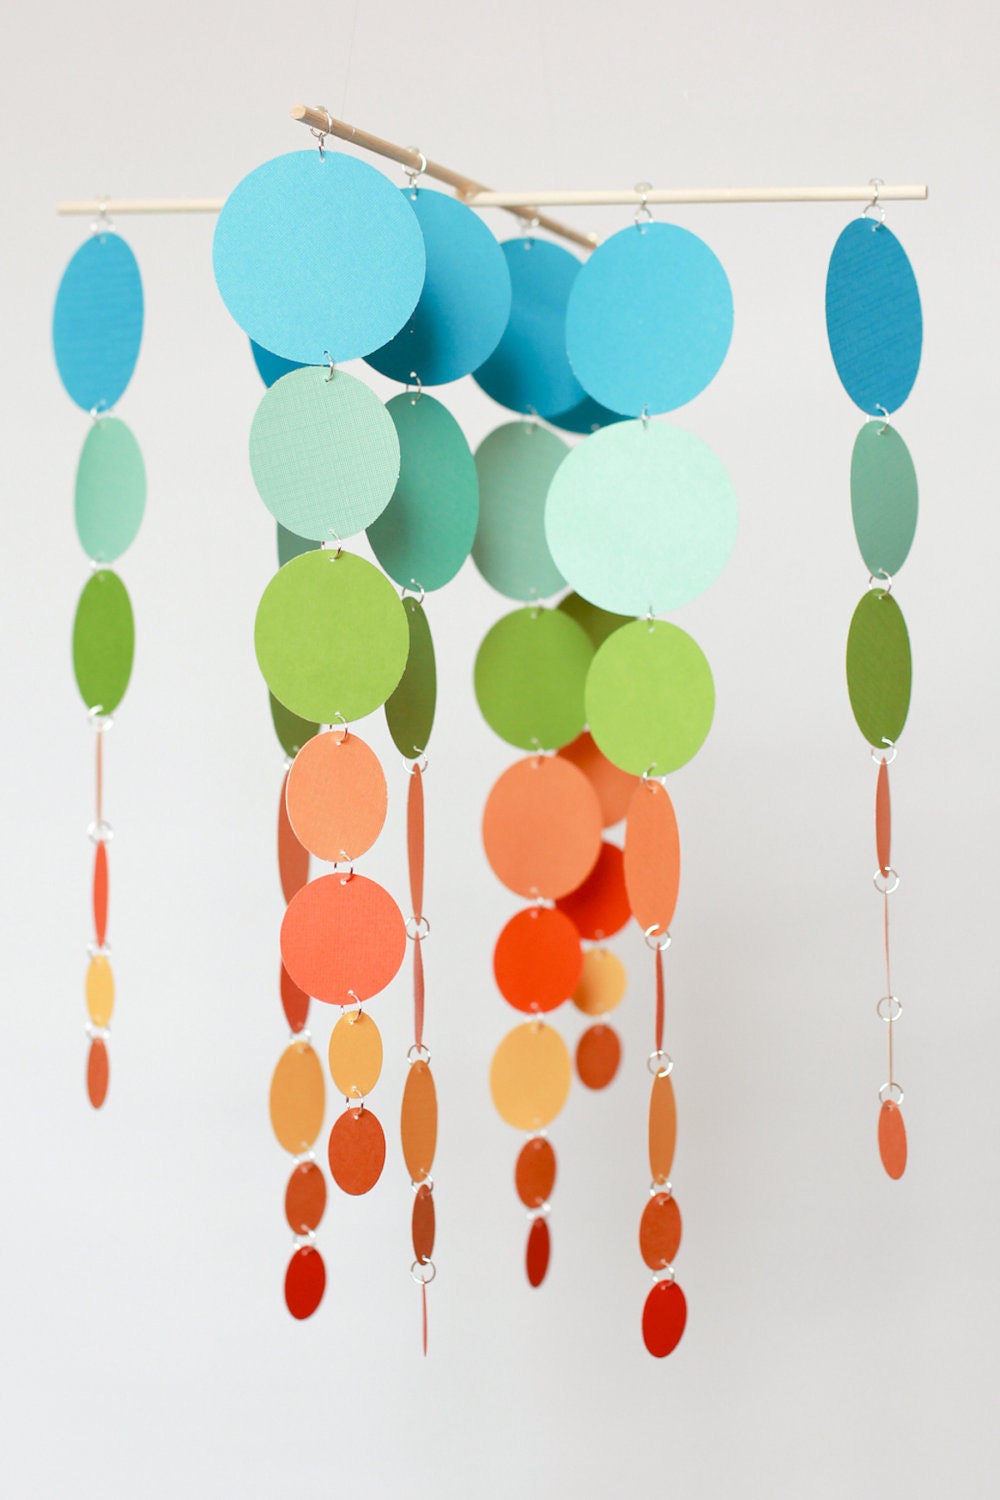
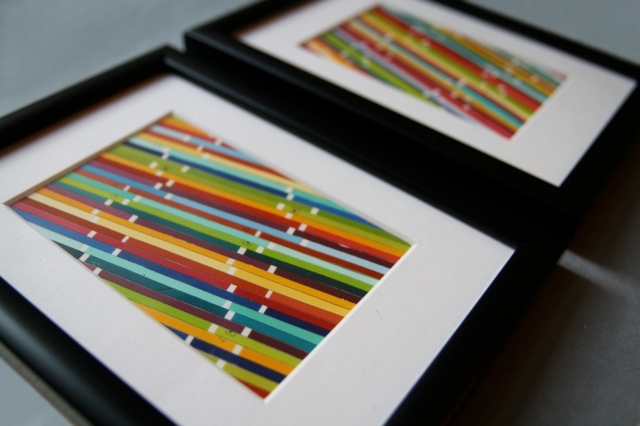
Well, I've had my go at using paint chips recently for a baby shower decoration / gift for a friend. And I've since seen some amazing examples of creativity using paint chip cards.  I'm sharing my favorites below, and you too can find inspiration with over 80 projects and pieces of art on this paint chip Pinterest board.

Since the projects / works of art are so fabulous, I'll let the photos speak for themselves.


Don't forget - there are 80+ paint chip projects to inspire your next work of art at this Pinterest board.


More DIY and repurposed inspiration collections:

Wood, DIY Projects:  here - or here - and here

Books, Repurposed & Recycled:  here and here

Lamps and Lighting, DIY & Repurposed:  here and here

Repurposed Projects That Rock:  here - or here - and here


Until next time...
Mike


Stumble this post

Check out these links where I party!
Related Post for bluevelvetchair.blogspot.com