750.
That's how many rolls of magazine pages are in the fun and funky recycled magazine frame project that I showed you in October. You asked for a tutorial...and you got it! I've finally put a tutorial together to tell you exactly how I did it, and to hopefully inspire you to make one for yourself.
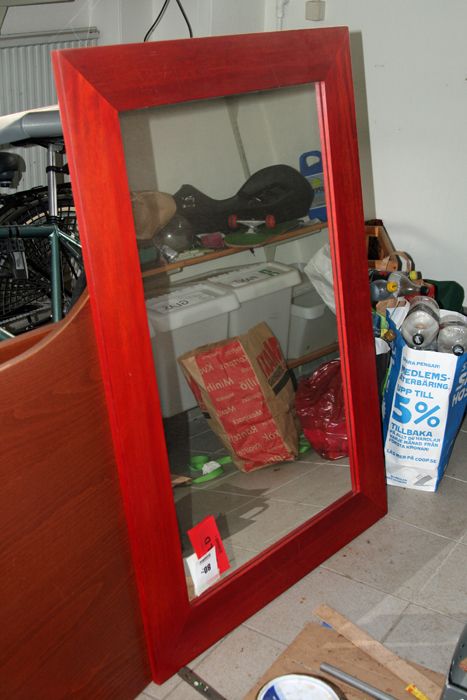
You'll want to start with one of these. Preferably from your existing inventory of oversized mirrors, or alternatively from the thrift store. The entire premise behind this project was low consumption - low cost. I got mine from one of my regular thrift stores haunts for the great price of $12. Okay, it wasn't really $12 since I live in Sweden and we use the Crown, not the dollar. But it was the equivalent of $12.
I first thought I was going to hang it on a wall in the house where there is a lot of 'side angle' traffic. So I decided to paint the inner and outer edges blue, since that was the overall color feeling I was going for. It's the same blue that I painted that fabulous old shutter that I picked up from a junk pile some while back. You might remember that I used it for a friend's baby shower a few months back.
And because I knew the frame would be covered with rolled magazine pages, I didn't bother to paint the entire frame. It's also because I love DIY shortcuts.
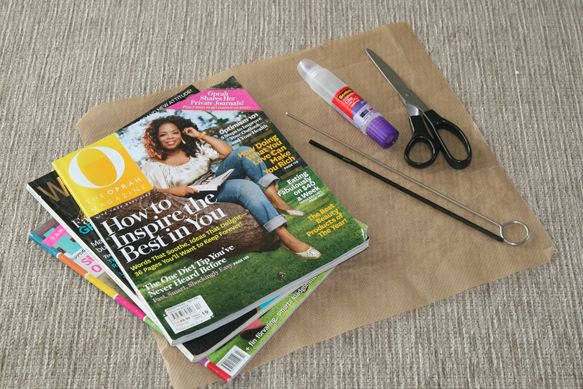
The supplies:
- A stack of pre-read (and hopefully passed around for your friends to enjoy before coming back your way) magazines
- Scissors
- Glue - I highly recommend Scotch Scrapbooker's Glue with 2-way applicator. It has the perfect sponge applicator at one end that makes gluing this project a breeze (and I wasn't even paid to say that!).
- A drinking straw
- Something thinner than the straw - I used a BBQ grill stick (metal)
- A glue gun and about 20 glue sticks
And now for the fun part...the rolling!
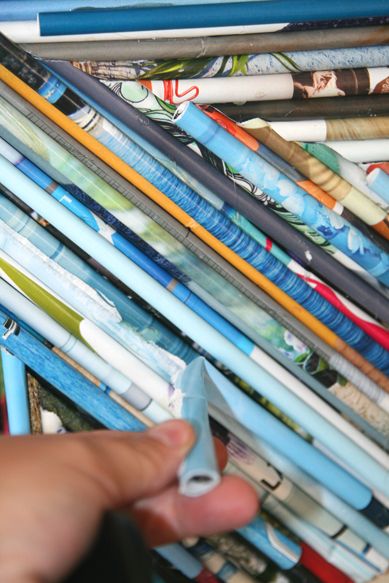
First things first. You want to choose magazine pages that have interesting colors (or the colors you are hoping to achieve) on either the very end of the side of a page, or the very top or bottom of a page. That's because it doesn't matter what colors are on the page as a whole. All you'll see when you've rolled it up is the edge colors. So look carefully at the edges of your pages, not the colors in the center.
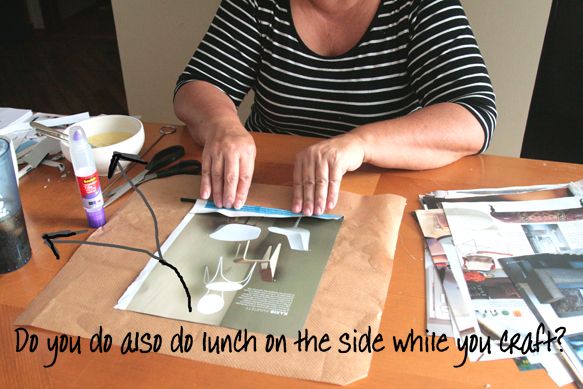
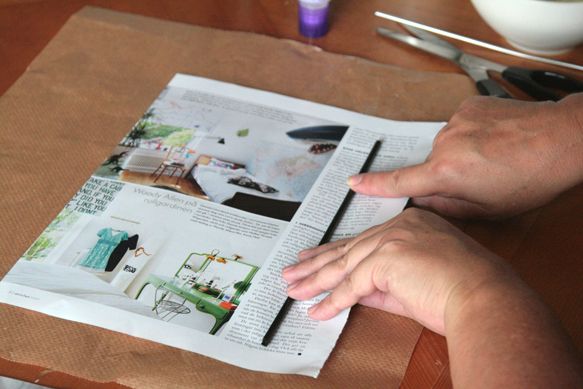
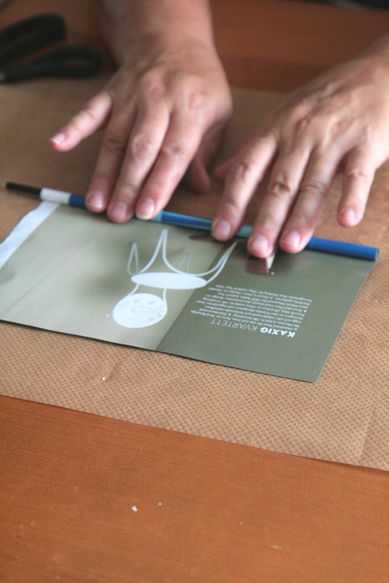
Now flip over the page so that it is right-side down. Place your straw about 1/6 of the way on the page.
Then flip the bottom of the page up and over the straw.
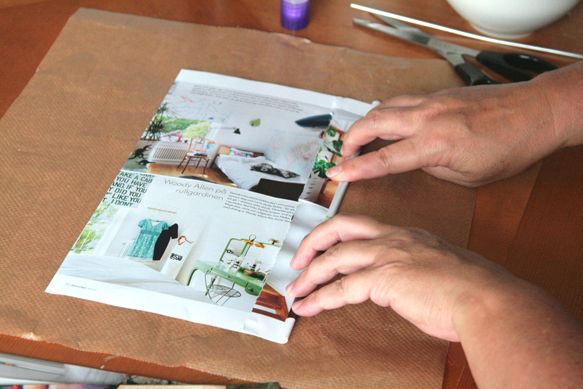
Press the paper against the straw and hold it tight as you start your page roll. Getting the roll started is the hardest part of the entire rolling process.
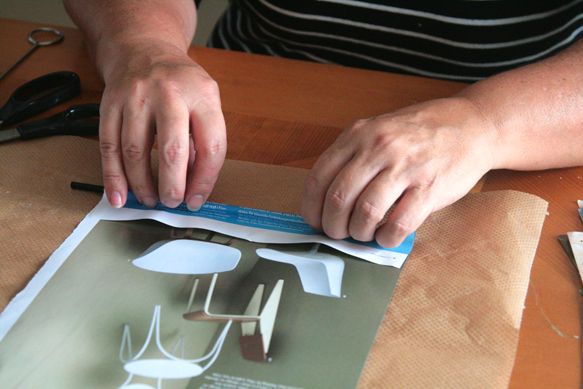
Now slightly adjust the pads of your fingers so they lay on top of the roll. This helps to get the rolling process started and zips along the process.
Rollin' rollin' rollin'...
Keep those doggies rollin'...
Rollin' rollin' rollin', Rawhide!
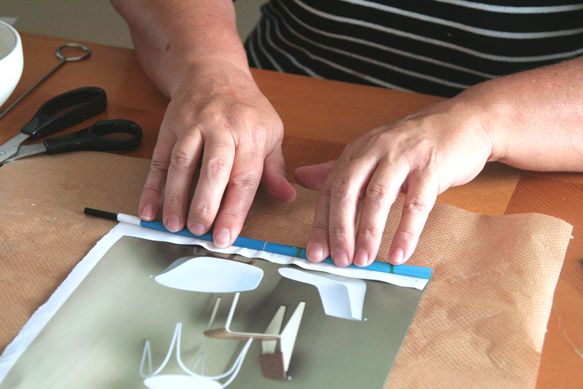
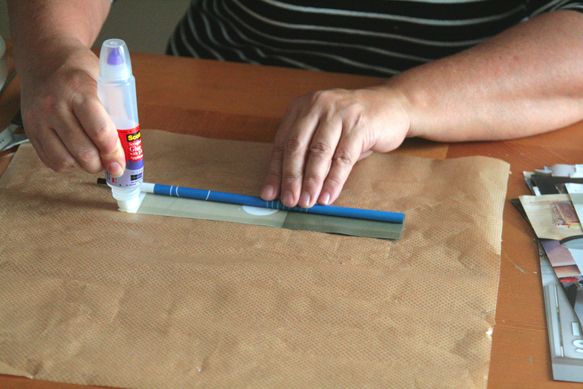
Oops...got carried away there a bit. Back to the 21st century. Now, without releasing that roll, pick up your glue applicator and zip that sponge tip along the entire edge of the paper that is still showing. Roll over one final time and hold the roll a second with the edge pressed down against the table. Pick up the roll and quickly run it between your thumb and forefinger along the length of the roll to give the edge one final press against the glue. I don't have a pic of the next part, but if you are using the long side of a page, you'll need something to push out the straw from the center of the roll since it is shorter than paper length and is now rolled up inside. Can't tell you how many times I forgot to push out that straw and had to figure out which roll was the last one after I'd already tossed them in a vase.
The frame? Cheap. The rolled magazine pages? Free (got them from friends). The glue? Minimal cost.
So what's the problem? The time it took to roll all the magazine pages that I needed for this big mirror frame that I had so ambitiously chosen.
In the beginning it took me about 1 1/2 minutes per roll. By the end I had shaved that time to just at 1 minutes per roll. Do the math. 750 rolls total. Let's say an average then of 1.25 minutes per roll, that's just about 938 minutes. Divided by 60 minutes, and we get just over 15 1/2 hours total of rolling magazine pages. Yikes! Had I know that up front I promise this project would have never seen the light of day! Sometimes ignorance really is bliss.
Needless to say, those hours weren't all in one sitting. Or two. Or even three. I rolled those pages (sometimes with a little help from my friends) over the course of about 3 weeks. I could only really handle 2 hours at a time of rolling magazine pages. And then the day finally arrived where I figured I must have enough rolled pages by now.
So I laid them all out by my 'workspace' on the floor so I'd have easy access to grab them as I glued them to the frame.
The weapon of choice.
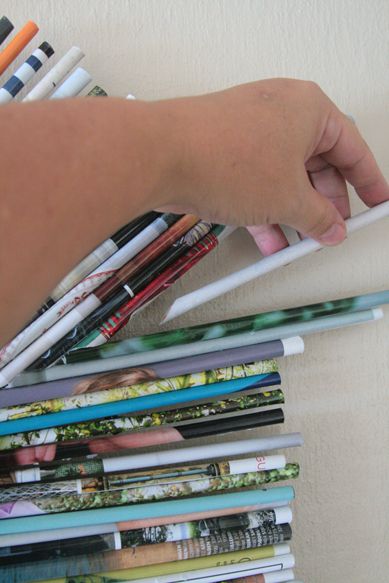
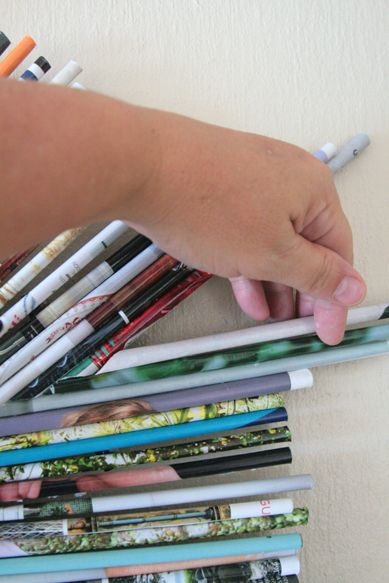
Now, for some unknown reason, I don't have any photos of when I was gluing on the paper rolls along the sides of the frame. To be honest, I was in the zone. It was super easy but you'll want to know these couple of tips. Only put enough hot glue on your frame for about 4-5 rolls, because that's all you're going to have time to adhere before that glue starts hardening up. Also be sure to put the very edge of the paper roll face down so your project is purty-er in the end.
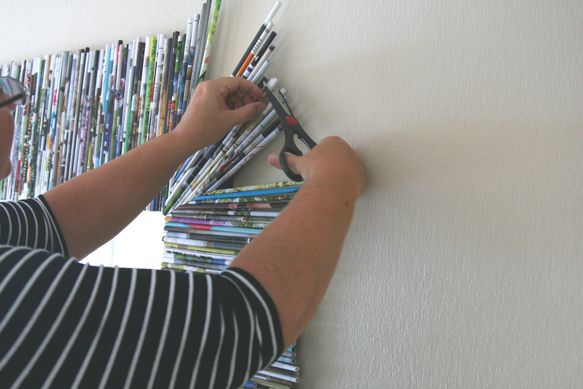
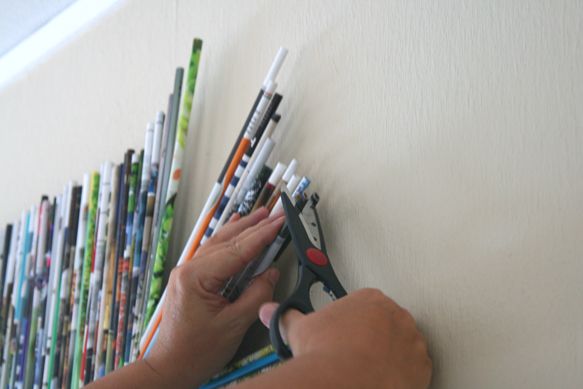
So I'm gluing, and going along just fine. Yeah, it's taking some time, but I can see the progress is going fast. And then the corners hit! It took twice as long to take care of the corners as it did the long stretches on the frame, because they had to be cut and fit in a way that would give a nice rounded edge to the frame. Otherwise I would have ended up with some open gaps on the outer sides of the corners, which was not the ultimate look I was going for.
So, I started cutting the tips at an angle to get them to tuck in nicely against each other. But eventually I ran out of frame to glue them to, so I had to start gluing them to the roll just beside them (still using the hot glue gun, and having some small burn blisters on my fingers and thumbs by this time). And I realized at this point that I was still about 100 rolls short! Huge bummer! Stop the production. Back to rolling.
OOPS! Design error! This was where we realized that because the mirror was flat on the floor, and the rolled pages hung out quite far over the actual frame itself, we wouldn't be able to pick up the frame by the paper edges without bending them and ruining them. Ugh! So, we awkwardly got our hands under the corners of the frame where the rolls were not finished, and had to hang the unfinished project on the wall. A drop during the hanging process resulted in some casualties, but thank goodness nothing major, as about 80% of the rolls were on by this time. Once that baby was secured to the wall (never to be moved again), the process of completing the corners carried on...
...and on...
...and on. I had to even start cutting the rolls that were being glued in the corners because they stuck out further than the intended curve of the corners.
Because I'd left the edges of the straight lined sides a bit jiggly wiggly on the lengths, it didn't need to be a perfect angled cut or anything...so I just eyeballed it and cut slightly varying lengths as I went along...
...and along...
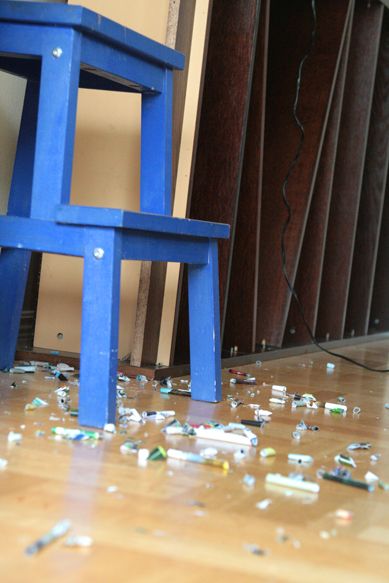
...and along. Even I couldn't think of a way to reuse these fallen bits - and don't think it didn't cross my mind! I have a sneaking suspicion that my husband is starting to think I'm a junk hoarder.
Yes, there were mistakes along the way. This corner turned out much more blue than I'd hoped. I couldn't see it until I stepped back from the frame to get a different view. If this happens to you, just pull those puppies off without worrying about the glue and such underneath. You'll be able to cover that up with a new roll.
Ah, a finished corner. At this point my patience had been duly tried and the thought of project abandonment had crossed my mind many times. It had taken about 6 hours of total assembly time.
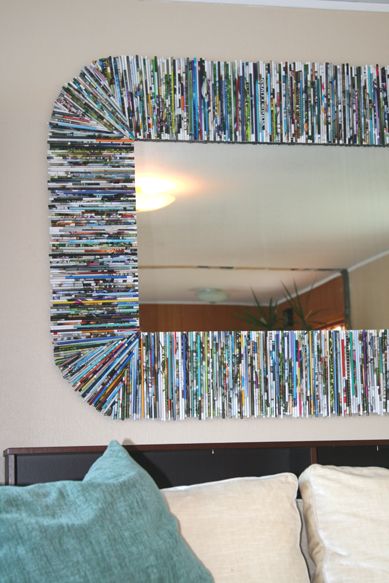
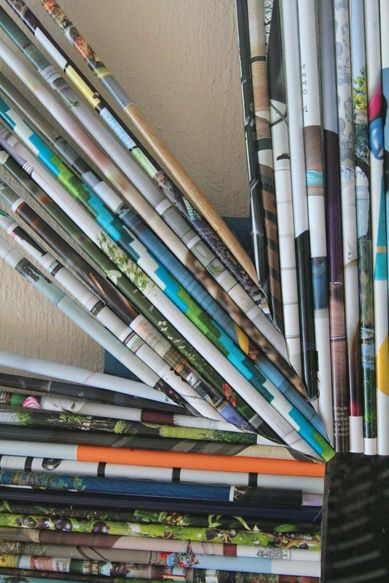
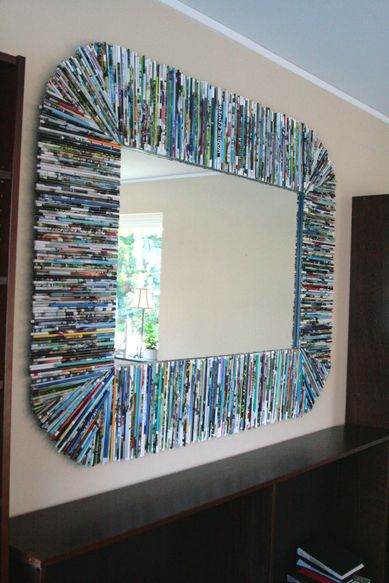
But then I took a stop back. And I saw this. I'd added one more layer of randomly placed page rolls to give a bit more 'blue' and a bit more texture to the piece. It looked like this from the front...
...and then I was pleasantly surprised at the shift in hues as I moved to the side.
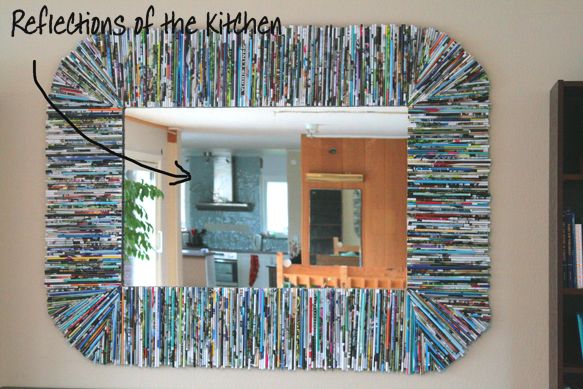
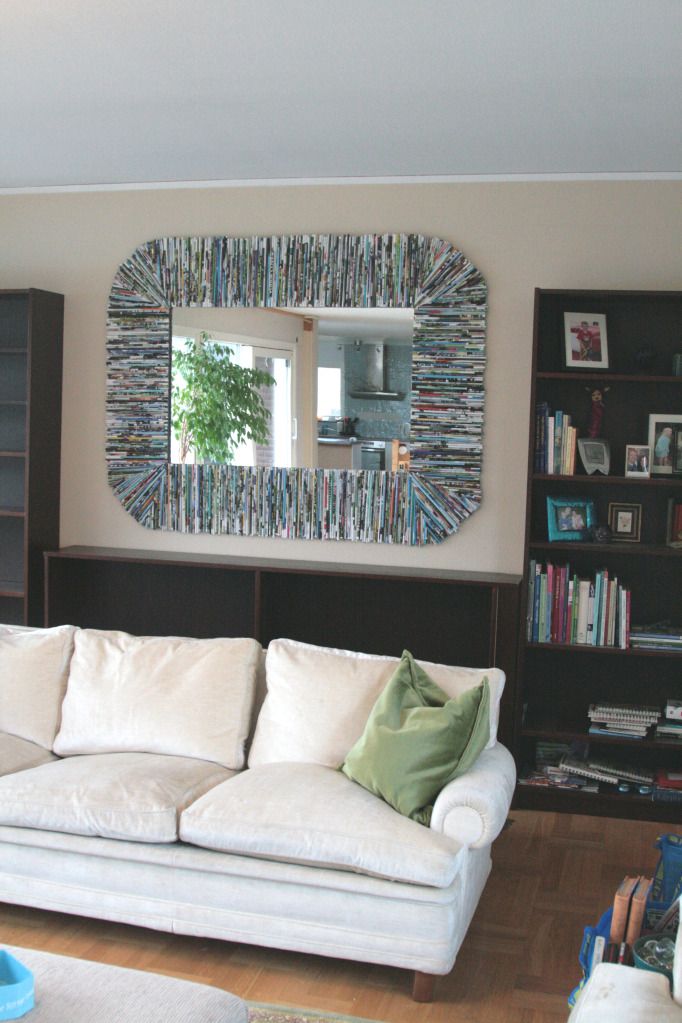
There she was. In all her glory. The sound of soprano angels filled my head. I was happy! Exhausted. But happy!
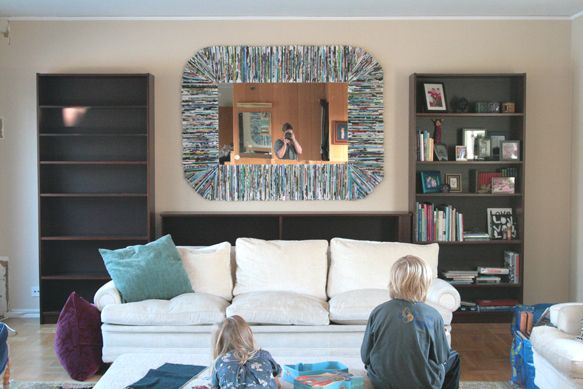
The kids were even kind enough to come and admire mommy's weird frame made from magazines.
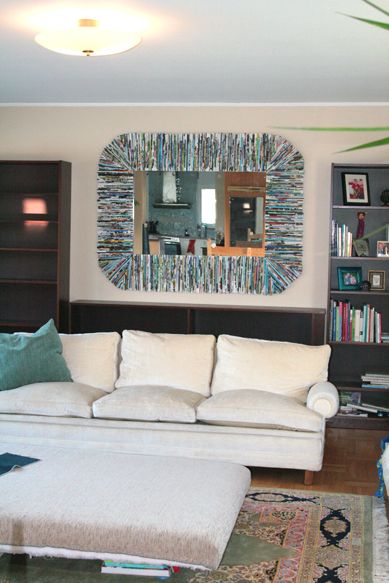
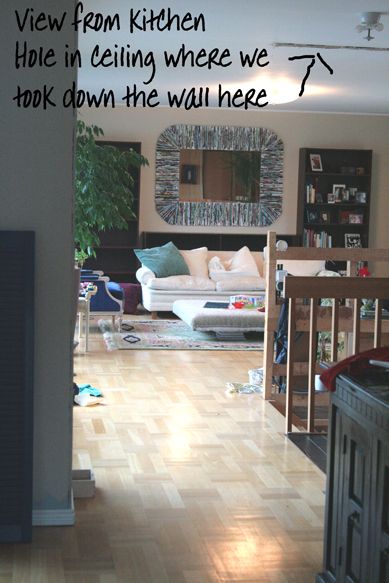
She now stands proudly as the centerpiece of the living room decor (currently under renovation). And there she'll have to stay until we are ready to say goodbye, because the day we try to take her down off this wall is the day that we'll damage the rolls because they won't be able to carry the weight of the mirror, and they are too long for us to get our hands behind them to hold the wooden part of the frame. Oh well. There will be more magazines. And more frames. But I'm just not sure I'll ever attempt one that takes 750 rolled magazine pages!
By the numbers:
750 rolled magazine pages
15 1/2 hours of rolling time
6 hours of assembly
everlasting joy
If you have more questions, just let me know. And if this isn't the recycled magazine project for you, don't miss 25 great recycled magazine projects that will definitely inspire!
Until next time...
Mike
Stumble this post











This is AMAZING!!!! You are so creative! And it's beautiful! Congrats!
ReplyDeleteabsolutely, positively stupendous! I learned all about rolling magazine pages - thanks! but I think I might try something smaller...but your mirror is so great!
ReplyDeleteThis is so incredible. Thanks so much!! I can't wait to start my own project...I'm thinking a few Christmas gifts! (definitely smaller than your project, though) :)
ReplyDeleteHowever, I didn't see the barbeque grill stick put to use...do I need to find one, or is it necessary?
Thanks!!!
ok, beginning the rolling process!!!
ReplyDeleteYou are the most creative person I know. Please move near me again!!!!
ReplyDeleteRather awesome! I wouldn't worry about taking it down.. you'd only damage a small portion of the rolls, and can easily 'patch' - or so I imagine.
ReplyDeleteWow, Michael! That mirror is AMAZING. Yeah, it took way more time than most "normal" people would have spent on it, but you (and other DIY-ers) are not normal (In a good way), and that's why people read your blog. I am super impressed, and despite how long it took you, I am now considering copying the project. I am obviously not normal either. :) Lovely work! - Rachel
ReplyDeleteTHAT was awesome!!!
ReplyDeleteWOW!! What a beautiful finish! All your hard work paid off. I love the fact that you tell ALL...even your mistakes! That's how we learn (those of us reading here too) from our goof-ups, and I appreciate you leaving in those little sidetracks, so that anyone who picks up where you left off and create with rolled magazine pages will not have to go through some of the same problems. You already solved those for us. You explain to the "n-th" degree and your pics are great. I love this project, maybe if you do this again, you could use a much smaller frame? Ha! 'Not making fun, I also know about those projects that I get caught up into and can't turn back because of whatever. Thanks so much for this tutorial
ReplyDeleteThis is amazing! I would love to try this maybe once we buy a house beacuse i dont want to spend all that time and have to take it down and break it! Thank you so much! Amazing♥
ReplyDeleteThanks, Tamara! Definitely wait until you know you'll be somewhere for a period of time. I don't know if I'll ever be able to move it with me if we ever leave this house. That will be a sad day, indeed!
DeleteWow, that is amazing. Nicely done.
ReplyDeleteThis is awesome!! Have you tried rolling from the edges? It creates a random length and you can see the swirl of the edge of the page twisting around itself. If you roll from the edge, you also don't necessarily need a straw/stick, you just push the corner and it rolls itself. put some glue across the magazine right before the widest cross section (the diagonal) and keep rolling! It is probably a bit more messy, but it is a bit faster I think.
ReplyDeleteOoh...I'm going to have to try that (from the corners as you say below). I'm in love with the color variations that the rolled magazine pages provide. I just don't tire of them because there is no real color scheme. It's such a perfectly blended mesh of colors. Gonna try rolling from the corner to see what I end up with. Thanks for the tip!
Delete**I meant rolling it from the CORNER of the magazine/newspaper page, not the edges.
ReplyDeleteDid you varnish the magazines after completing? I have just finished one. I am going to hang in the bathroom and thought that a varnish would save the magazines from getting wet but not sure what I should use. Any suggestions?
ReplyDeletesomeone was just mentioning spray sealer...but not sure if that is spray laquer or something else. I did not use any final sealing spray.
DeleteI love this! I'm going to try it on a smaller scale with Ikea mirrors i got from a freecycler. I'll try a sealer spray as well. Has anyone tried this on a tabletop object? I was thinking of a cylinder lamp.
ReplyDeletewhat kind of spray sealer will you use. I might have to try that. I think it would be great on a tabletop object as long as there is no moisture - and a cylinder lamp would be fab. I want to do an office wastebasket.
DeleteLove this, I made some teeny tiny mirrors framed with magazines rolled from the edges but now I'm desperate to try this out on a larger scale.
ReplyDeleteP.s I'm super intrigued to see what would be on sale in a Swedish thrift store, please please tell me that it's all Gold Lame jumpsuits and Abba records oh and vintage Ikea ;)
Hi Ruby / you will love it on a larger scale! Lots of work - but so much appreciation and joy.
DeleteOK...the swedish thrift stores are packed with gold lame jumpsuits and vintage ikea. Not really, but I wanted to let your fantasy live just a little bit longer :-)
I'm finally ready to give this a go...I didn't realize I had proscrastinated a year! What do you think about using spray adhesive to attach the rolls? Since the rolls aren't weight bearing or structural they just have to stick.
ReplyDeleteThis is awesome. Love ur pictures and ur pointing out everything that is wrong with ur house. Seriously? I guess women do sometimes inspect every little detail. Thanks a bunch. A truly wonderful project, sooo pretty!!!
ReplyDeleteGood day! Do you use Twitter? I'd like to follow you if that would be ok. I'm undoubtedly enjoying your blog and look forward to new updates.
ReplyDeletemy website - extended stay Tucson
Hello! I hope you don't mind but I decided to publish your site: http://www.blogger.com/comment.g?blogID=7218678013427074678&postID=7933641682639305188 to my internet directory. I used, "Blogger: Blue Velvet Chair" as your blog headline. I hope this is ok with you. In the event you'd
ReplyDeletelike me to change the title or perhaps remove it completely, e-mail me at rickey.
hubert@t-online.de. Thank you so much.
Here is my web blog :: Grapevine furnace repair affordable
my website - Arlington electric furnace repair
Every weekend i used to pay a visit this site, as i want enjoyment,
ReplyDeletesince this this web page conations in fact fastidious
funny stuff too.
Also visit my weblog Residential LED Lighting
Write more, thats all I have to say. Literally, it seems as though you
ReplyDeleterelied on the video to make your point. You definitely know what youre talking about,
why throw away your intelligence on just posting videos to your blog
when you could be giving us something enlightening to read?
Here is my blog post ... court ordered paternity test
A person essentially assist to make severely articles I would state.
ReplyDeleteThis is the first time I frequented your web page and up to now?
I amazed with the analysis you made to create this actual publish amazing.
Magnificent process!
My web blog: personal injury attorney